In December 1944, as part of the larger Battle of the Bulge, elite forces attached to II Panzer pushed forward far north of the main action against the US around Bastogne. Their objective was to take the bridges on the river Meuse, thereby threatening Luxembourg, Brussels and maybe even Paris (which imposed a curfew just in case). On Christmas Eve, they reached their furthest penetration west, and were within sight of the Meuse river near Dinant. Field Marshal Montgomery ordered his reserve across the river as a blocking force to hold them off until their narrow corridor of advance could be threatened by the Americans.
Not far from the main action near Dinant, a small bridge spans the river, and a detachment of elite Panzergrenadiers has been ordered to seize the bridge, opening the way to flank Montgomery's main defenders. Arrayed against them are the Royal Welch Fusiliers, cold but ready to fight bravely. Their engineers have set charges on the bridge. If things go sour and turn to a general rout, orders are for any nearby man to blow the bridge. The Germans will need to seize it in a quick strike, before the British are fully prepared to withdraw. [In other words, using the Delaying Action scenario, victory only comes if the Germans take the jump off point near the bridge and end the turn. Any other outcome is a victory for the British.]
The Patrol Phase: With three markers to Fritz's four (not just the Germans, but my opponent's name, in case you were wondering), I'm able to move up rapidly, locking down all three of my markers against his most advanced two.
His remaining two unlocked markers are quite far back, and will be useless for Jump off Points.
We reused the German patrol makers as JOPs, being as they were so pretty (my Christmas present to Fritz), and that Fritz lacked less obtrusive markers. He has a long way to go down the board.
Two of my markers were on the other side of the bridge, closer together than I would have liked. It was a price I was willing to pay to lock my opponent down so far back.
My last jump off point, determined by the scenario, is the bridge itself.
Fritz's elite Panzergrenadiers start with an 11 morale to the Royal Welch Fusiliers' 10. The disparity in force rating gives me 7 points, and with us deciding on a robust 10 points of support for the attacker, I had 12 points to play with. The British thus had: a Sherman tank, a Vickers MMG team, an entrenchment and a road block. The Germans kept it simple: two Panzer IIIs. Neither of us being an expert on Panzer III variants, we sort of chose at random which they were. One had better AP, one better HE. If you can better identify them, please let me know in the comments.
Fritz led with a tank, as is his wont.
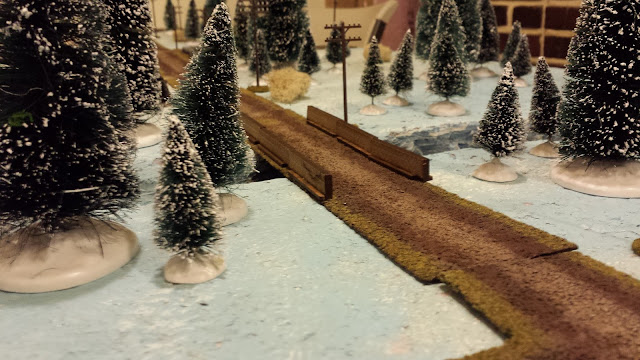
Seeing no reason to expose my infantry to his tanks, I decided a tank duel was in order. We had a straight road between us, front armor to front armor, and with a roadblock placed at the crossroads to prevent a rapid advance.
Oh isn't she pretty? Needs decals thought...
I also brought on my mortar team. Charlie (my mortar specialist, a painter before the war) was a bit concerned about the lack of contrast between the white smoke and the snow, but the platoon commander convinced him that it was a sort of homage to Kazimir Malevich's "White on White" and the Russian Suprematist movement. It seems to have worked, and Charlie dutifully laid down smoke.
...Blocking the view from Fritz's jump off points into the burned down house.
Achtung, Panzer! Two Panzers!
The Sherman took at the lead tank, and missed. The Mortar team followed up with smoke to prevent return fire.
Which of course, Fritz drove right through.
The Sherman was waiting for him, but again, no hits.
The Germans were confused by the sheer size of the tank trap at the crossroads. It seemed a little excessive. They thought only Americans felt the need to make everything so big, but it's possible that it's a disease affecting all English speaking peoples. Compensating for the small island maybe?
The Sherman got a lucky shot on the rear tank, wounding the commander and knocking out the turret for the game. It's now a mobile, armored machine gun. It also forced the first German morale loss for a wounded junior leader.
This was by far the most cautious game of CoC that we've played. Very cat and mouse. This tank duel went on forever, with no infantry other than Charlie on the board. It seems we both were looking to knock out the opposing armor before advancing with the more fragile infantry.
With so many phases of unused command dice (except those 3s for the tanks), we saw several turns come and go (the most we've seen in fact), with smoke coming up and Charlie dropping it back down. Good work, Charlie, even if you're working in such an ephemeral medium as smoke.
Finally, I'd had enough. I got a double phase. Time to force the issue. I brought on a section of infantry, and pushed them forward into a crater, rather close to the German jump off point on the left. I didn't really think I had a chance to take it - the plan was entirely to force him to bring on his infantry, committing to one side of the board or the other.
It worked, and two sections revealed themselves. While this didn't change his plan (he was planning to advance on that side), it forced him to reveal it.
Of course, now my one section was facing the four MG42s of those section. Fritz started tallying dice. As soon as it got over 30, I declared an interrupt.
Run away!
Partially hidden by smoke, the Grenadiers lost about half their dice, resulting in only one casualty. Could have been much worse.
The section pulled back the burned out house and hunkered down.
Serious forces now on the board, the British smoke limited actual engagement.
With it so difficult to shoot, the Germans hunker down, waiting on overwatch for the smoke to come up or some other opportunity.
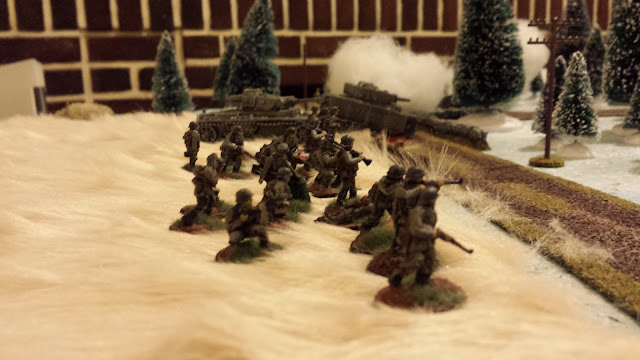
With a solid wall of smoke in front of it, the Sherman turns off the road and trains its .50 cal on some of the Panzergrenadiers in the field.
The more intact Panzer decides to plow through the smoke, presumably trying to get around the roadblock and advance on the objective. Unfortunately, it gets stuck on the wall.
The infantry will have to deal with the Sherman in their own way. Fritz deploys the Panzerschreck team on the end.
I confess to a rapid heart-beat here. He's got a clear shot at the Sherman's front armor with a seriously deadly weapon. If he hits me, there is a real chance of getting knocked out in one hit. Thankfully the rocket goes wide.
The damaged tank rolls up and parks in front of the Schreck team to shield them from return fire.
With the Schreck team hidden, the Sherman takes a shot at the damaged Panzer as it starts to back up into cover.
The shot connects and delivers another blow to the turret. The crew bails out and runs for the rear. One tank down!
Meanwhile the Sherman has pulled back behind the cover of smoke.
Firing through a gap in the trees, the stuck Panzer shoots at the Sherman but the shell is deflected by the armor.
Having another double turn, I move up another section of infanty. With Fritz committed on the left, I want to threaten his right.
Meanwhile the Sherman sees a chance at the Panzer's side armor, and takes it, but misses. The Sherman is now nearly at point blank range.
Fritz rolls a double phase, and with the Sherman so far advanced, the Germans move their Panzerschreck team up under the cover of the British's own smoke. Fritz has a full CoC die and is planning to use it to end the turn and pull up all my smoke, exposing the Sherman at the same time.
Thankfully I have my own CoC die and interrupt with the Sherman's .50cal, killing one of the Panzerschreck team and pinning the remaining members. They can't fire!
However, with all of the smoke suddenly gone, the Panzergrenadiers can finally shoot at my infantry. They take full advantage of that fact.
While taking withering fire from the Germans, when the British regain the initiative they are able to wipe out the Panzerschreck team - another morale hit, and the biggest threat to my tank gone.
Charlie - get back to work! Smoke can only be dropped once per phase, but this one at least is able to screen my badly mangled section in the ruined house.
The guns turned on the other section which rolled too poorly on movement to make into cover. After several hours, we're finally seeing some casualties.
Fritz knows its now or never. His final section comes on behind the stone wall and roadblock.
But that's when the Sherman finally gets lucky. A solid hit causes the last Panzer to explode into the nearby infantry. The explosion caused no casualties, but was enough to shake the Germans to their core.
With that, both due to the late hour (this game went about 4 hours thanks to our caution) and the loss of both tanks, the Germans decide to withdraw. In the end, the British were down to 7 morale, while the Germans had fallen to 6. We both agreed it was unlikely that the bridge could be taken, as the Germans had few weapons left to threaten the Sherman, excepting at the most suicidal of ranges, and I still had a MMG team waiting to surprise any advancing infantry. A victory to the British, and a historical outcome to the battle. What a game!
What I learned this game:
1) Sending a scouting force to force the enemy to deploy works very well. Once on the board, the element of uncertainty is gone, and that can be a serious advantage. It didn't really do much in this case, practically speaking, but it allowed me to decide where to focus.
2) Roadblocks remain a solid support choice. That one point selection kept both of the Panzers from threatening my infantry, and caused one to try to go over a stone wall and get stuck.
3) Tanks are bad-ass. The end of the game saw Fritz questioning the value of tanks, but it is clear that the Sherman was the MVP of the game. Not only for taking out two enemy tanks, but for the lovely .50cal mounted on top. This battle was really fought and won by tanks.
4) Smoke + Tanks = a serious advantage. I'm a huge fan of dropping smoke, and doing it for the first time in combination with the tank duel made it far easier to win the duel. It frequently denied the tanks their shots, and for most of the game prevented both tank from concentrating their fire against the Sherman.
What I'm worried about:
1) Fritz is definitely going to try to figure out a way to take out my mortar team. I was watching his blood pressure rise as Charlie painted the field white. He mentioned perhaps bringing in some German mortars to try and pick off my mortar teams with H.E.. I think if he'd managed to do that this game, he might have won.
2) Better German tanks. Panzer IIIs are only slightly less powerful than the Shermans, by about one die. If instead of two Panzer IIIs my Sherman had been facing off with a Tiger, I don't think I would have been able to win the duel. And my piddly little PIAT wouldn't have been much help. I may have to invest in a Churchill or Firefly just in case...


