Top Image

Top Image
Showing posts with label terrain. Show all posts

Friday, June 16, 2017

Urban Tiles for Battletech

For a while I haven't been exactly satisfied with my Battletech terrain, specifically my urban terrain.  I use paper buildings, which work perfectly well, but paper roads tend to curl and not look so hot on the table.  I thought I'd try my hand at modular city boards designed to work with my paper buildings.

Herein I tell the tale of how I made these not entirely successful boards.  I mean, they're ok, but there were some lessons learned that others might benefit from if trying to make their own. 

Ok, let's get to it:  I started with a sheet of mdf hardboard (the stuff the bottom of your dresser drawers are probably made of), which is cheap at Home Depot.  Mdf is pretty thin but very sturdy and makes great bases for terrain. I had the sheet left over from another project.

Using a bandsaw, I cut them into squares and rectangles, and here made my first mistake.

Lesson 1:  When making modular terrain, don't free-hand with the saw.  I drew my roads on only after I cut everything up, and so I ended up with sizes that weren't entirely identical, and so don't fit together perfectly. 

After the boards were cut, I drew in the roads of an appropriate size for the buildings. As you can see, the cuts aren't exactly even.
Next came the roads and sidewalks themselves. I wanted to achieve a raised effect for sidewalks and curbs, so I used cardstock to build up these areas. I cut cardstock into strips for the curbs as well. They're not exactly to scale, but they are small enough to create the illusion that they are.

Lesson 2:  Cardstock isn't really thick enough for this. It turned out to be more or less unnecessary. I could just have glued on the strips and had pretty much the same effect. Further, the cardstock didn't take the paint and primer as well as the mdf did as you'll see.


A lot of unnecessary work went into this.
Priming and painting the base coat in two stages. 

1) Prime everything gray (automotive primer).  Then, with an airbrush, I used two lighter greys to build up to a more "concrete" light gray on all sidewalk areas. I left the roads themselves alone as they are going to be totally different, but didn't worry about overspray either.

2) To do the roads, I used masking tape to mask the concrete areas, and primed the exposed roads black.  Then, using a darker and then a lighter gray, brought it up to a more asphalt color. I made sure not to use too similar grays for this.

Came out ok...

Always nice to "test" your terrain with some posed shots...

Well, sort of.  The masking tape I used was not exactly artist quality. It was cheap, and very harsh on the painted paper, even pulling up the primer.  While something similar happened when masking the roads later (for the lines), its notable that that tape only pulled off the airbrushed color, not the primer.  Paper just doesn't hold it as well.

Lesson 2.5: Paper doesn't hold paint as well as hardboard. Oh, and use high quality masking tape on airbrushed areas.

Afterwards I had to go back in with a brush to cover these areas in an approximation of the airbrushed color. Needless to say, it's a bit blotchy.
Now for the lines.  There are a lot of different ways that lines are painted on roads, depending on where you live. I went with double yellow in the middle, with white for the shoulders and intersections. Using a good Tamiya masking tape meant for minis, I taped off the lines. 

This needed to be done in two or three steps, as the double yellow is closer together than I can achieve with this tape in one go, and also to create sharp intersections.


Going in with the airbrush, I painted everything white.  Yellow won't cover anything else.  I thought I was able to more or less freehand with all that masking, but it turned out there was significant overspray from the airbrush.

Lesson 3: Tape should be at least .5 inch in width to prevent overspray.


And yet, even with the good tape, a lot of airbrushed paint came up when I removed it. The dark black below is the primer color which didn't come up.


Some boards fared better than others.


Once all the lines were painted, I went back in with a brush to do corrections. I didn't try to cover all the mess, and as it happens it makes some areas look damaged, like a real road.  Kind of a happy accident. Then I brushed on a lighter shade of grey for the thin curbs to bring them out.  The result is below.

Final product.  It's more or less adequate.
And here's how it looks on the table.  I also added a park area to one of the boards, with two colors of flock. Probably the best looking part of the project.

Lesson 4:  Measure better.  I just threw the uneven pieces together, drew on roads and went with it. That means that the final product is somewhat less modular than it should have been, as not all the sides fit together without gaps. If I try something like this again, I'll spend far more time on the planning phase.

A city!  Time to blow it up...

Monday, April 4, 2016

Terrain Fail

So, a new game and new scale means an exciting new terrain project. Battletech, my current obsession, is 6mm, so almost all of my current terrain is ill-suited for the tiny little giant robots.

For phase one, I decided that I wanted the following:
1)  Farm fields
2) Modular, stackable hills.
3) Tiny little roads
4) Buildings, but more on that later.

So, I had some fortuitous half-days at work this weekend and made a run to Home Depot and Michael's for supplies.  However, as the title of this post implies, pretty much nothing went according to plan.  If you've been reading my blog you know that I love making terrain, and love pretty tables. If you've read my tutorials, it might seem that nothing ever goes wrong.  This post is to disabuse you of that notion.

First, the fields.  Simple!  Free carpet samples from home depot. The longish ones got savaged with kitchen shears.


My go-to brand for serious spray paint:  I got lucky and found two cans on clearance.   This stuff has the best coverage, best color, that I've ever seen come out of a spray can. However, it clogs very, very easily. Like, if you spray on an angle it clogs up completely. 


Look at the color though!  Just what was needed.  However... ALL of the cans are now clogged up and spray absolutely nothing. All of them are almost completely full... Frustrating, but at least I got the fields done.  Ok, check that off - they were essentially free, look decent, and took about 10 minutes total.  The real cost was my spray cans which may or may not be ruined. I will try to soak the caps in thinner...


Next - hills.  I'm going in a direction I normally would gravely resist. I'm not as much a fan of those ubiquitous stylized wargaming hills one sees everywhere, but using 1" foam with clearly defined levels will be exceedingly useful for Battletech so I'm going with it.

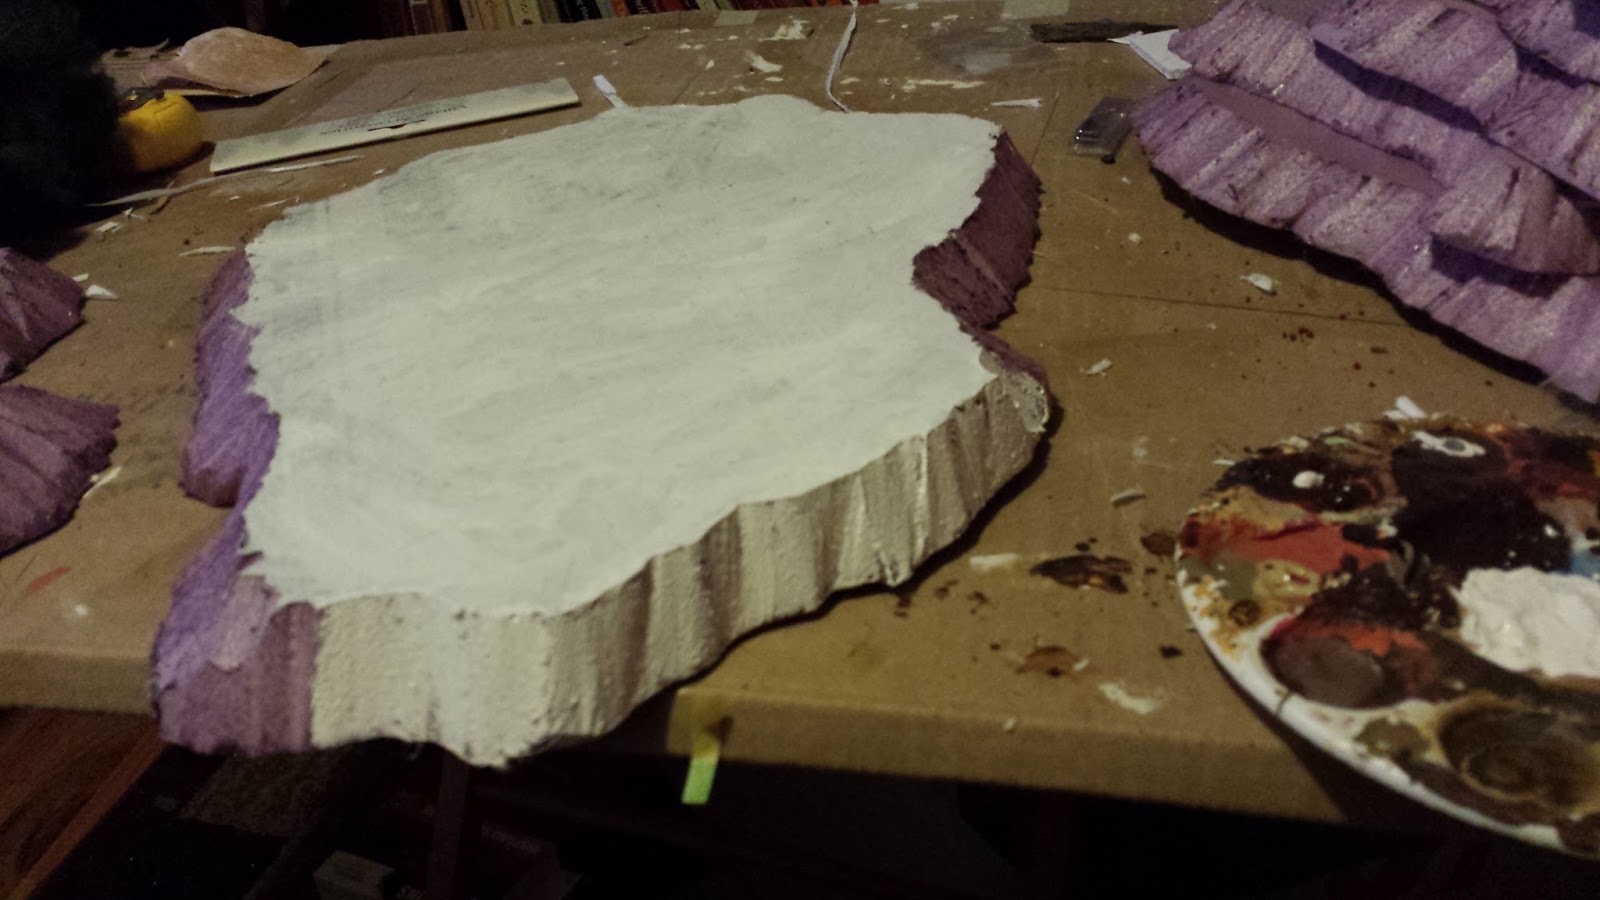
I bough a whole sheet of 1" insulation foam for about $8, and everything you'll see below is about 1/8 of the total sheet, so about $1 worth of foam. To cut it, I used the only available foam cutter I could find at Michael's, one really intended more for styrofoam than this heavy duty stuff. But if you go very slowly it works and makes far less of a mess than a knife, while doing a better job.

However, it broke after I got the below done, the wire bending and starting to spark. This is actually my third one of these, and this one lasted maybe an hour. I need another solution. I'm just not going to keep buying these, but the next step up is like $160. I have a pile of foam and no ideas, so please let me know if you have a solution.


Oh well, onwards and upwards. At least I got a good chunk of foam carved before the cutter's sparky death. Obviously spray primer is a big no-no on foam, so I brushed on gesso.


And then went to the airbrush. Now, as it happens, I got a cheap crappy brush for X-mas, and after a single use replaced it with an Iwata Eclipse. The difference is just insane.  However, for this project, I decided to experiment with using highly thinned cheap craft paints, so I went back to my bottom feed crappy "Master Airbrush".  Ugh, no.  I had to have the PSI so high to suck the stuff up from the bottom feeder that it became a runny, splattering mess.   Bad enough I wiped some pieces off with a paper towel.

So, against my better judgement, I dumped the already thinned paint into my gravity (top) feed Eclipse. Oh man, did it go on smooth as butter.  See?


Oh but at what cost?!?  At the very end, I got a clog, and such a clog it was that I was tempted to write epic poetry to describe it. I shall refrain.

For those of you who don't airbrush, there's a nozzle through which the tip of the needle pokes out at the very tip. It's a tiny little (easily lost) brass piece that is the devil to clean. Well, it was so gunked up that the needle wouldn't come through, which means neither could paint.

After an overnight soak and literally an hour of very careful cleaning, I got the needle to poke through a little, but not to its usual depth. I can kind of paint with it... kind of. But it's not the same, and I have my doubts that it ever will be. So, I have a new nozzle ordered and on the way.

Lesson learned:  NO CRAFT PAINT IN THE AIRBRUSH. Even thinned, it's too gloppy. What do you expect for $1 or less? Hell, I don't even want to speculate about what's even in one of those bottles... So yeah, putting the money out for a couple of more bottles of airbrush ready paint or quality acrylics is the better deal than shelling out $25 for a new nozzle so you can use your $1 paint.

And then there were the roads...

So, I saw someone on line do this, so I thought I'd give it a try. Silicone caulking in strips on some kind of plastic (for non-stick purposes), smoothed out and textured.  Cheap, and what could go wrong?

How about everything?


First off, it's  not so easy to form into road-like shapes. Second, it doesn't dry well on plastic. Third, it doesn't really peel off all that well.  Fifth, it curls at the edges.

Sixth, well just look at it. Does that look like a road to you?


No, more like a bobsled course. After peeling a couple off careful, I ended up just bunching the whole thing up with the plastic and throwing it in the garbage.

What's particularly crazy is that all of this happened over the course of two terrible days. Lets look at the casualties:

- Broken foam cutter
- 6 clogged spray cans
- terminally clogged nozzle
- utterly aborted silcone roads (1 tube caulk, 1 cheap plastic drop cloth)
- wounded pride

On the upside, I love the fields, and the hills will turn out fine, eventually. Hopefully I have an easier time with the buildings...

Thursday, March 3, 2016

Making Spain: Village Complex


In preparation for the fourth table in my current Quinto campaign, a fight over the a piece of the town itself, I knew I needed a lot more buildings. In fact, even after this project, I'm feeling like I should have/could have made more. But this is certainly a step in the right direction. Towns in Spain grew up organically over centuries (at least), and the buildings are often clustered quite closely together. Thankfully Quinto is not as dense as other towns, and there are plenty of walled yards and ruins to help me spread my few buildings out. If you want more details on Spanish towns, check out this post in Arlequin's excellent blog.

I decided to make a town complex of several buildings around a central courtyard. I knew I wanted access to any part that there might be a window, more than one entrance, and plenty to fight over. While working, I did a quick and dirty second building, and now I wish I'd made two or three extra. Oh well...


Everything is made of foam board, joined with hot glue. Compared to most other buildings I've made for this project, the complex was pretty fiddly. Fitting together the roofs, making interior floors and ledges, and a removable wall, all were challenging for someone who sucks at measuring.


The secondary building was thankfully very straightforward.


The usual details were carved in with an x-acto knife, after carefully peeling off the paper coating of the foam board.

At what amounted to the last moment, I decided to add a balcony. Balconies are everywhere in these old towns, but mine will have to be happy with just one.


The removable wall. It allows me to slide figures into the bottom floor of the larger building while keeping the second floor immobile.


Roofing! It's not hard to make these (slightly oversized) "Spanish tiles".  They're just half of the corrugated card inside regular shipping cardboard (soaking it in the rain to separate it), cut into strips and attached, overlapping, to a piece of foam board with hot glue.


Some small sticks cut down crudely with the knife become the railing for the balcony. Not terrible for being completely unplanned.  Sadly, to make it large enough to put a figure with a penny-sized base would have made it look very odd. Spanish balconies are very shallow typically.


The removable wall was attached to the removable roof on the largest building so that the whole thing lifts up. This roof required the most work obviously, but not just because of the wall. The pitched roof (as opposed to the single slanted roofs for the rest) required triangular pieces of foam board underneath to keep everything in place and fit on top of the walls. This involved way more measuring than I typically like to do.


Then the application of my secret weapon: Martha Stewart Stucco Effect.


 The interior courtyard after stucco application and glued down "tiles" of cardstock for the courtyard.


 Here it is primed. Some of the interiors are primed brown in their depths, as I knew I wouldn't be able to get a brush into all the nooks and crannies.


Base coat with cheap craft paint. The paints used are the same as all of my Spanish buildings, for uniformity. While it is true that buildings are rarely uniform in Spain, even in color, Quinto is far more uniform in its older buildings, and besides, it really ties the table together.


As usual, I then applied a heavy coat of Sepia wash. This time I tried Citadel's Sepia wash, which was very nice. However even with the larger bottle sized recently released, I went through nearly two full bottles on just these buildings. After it dried, it was time for my usual four color drybrush. Three colors is the minimum I'll use, as any less than that doesn't create the same illusion of texture and depth. I use all cheap craft paint: Craftsmart Golden Brown for the base and first drybrush coat, Americana brand Fawn, then Desert Sand, followed up by a very light application of Wicker White for the edges and details.


The final pieces: The complex is intended to be usable for a number of purposes. It can be a country farm house, a monastery, etc.


Finally, a picture of how it looks in table 4 for the campaign.  Time to game!


Monday, January 18, 2016

Making Spain: Fortifications


Sometime in December I committed myself to writing and playing a Spanish Civil War campaign (for Chain of Command), based on the Lincoln Battalion at the Battle of Quinto. I wasn't sure what all the tables would look like, but I knew that in the first or second game the Lincolns would have to try to break a fortified line defended by Carlists.  I started the terrain, but then the holidays happened, as they do, and I didn't get back to it until after New Years. Sadly, this means that some images I took got lost in the jumble of holiday photos, but there are enough that they might help folks looking to do the same sort of thing.

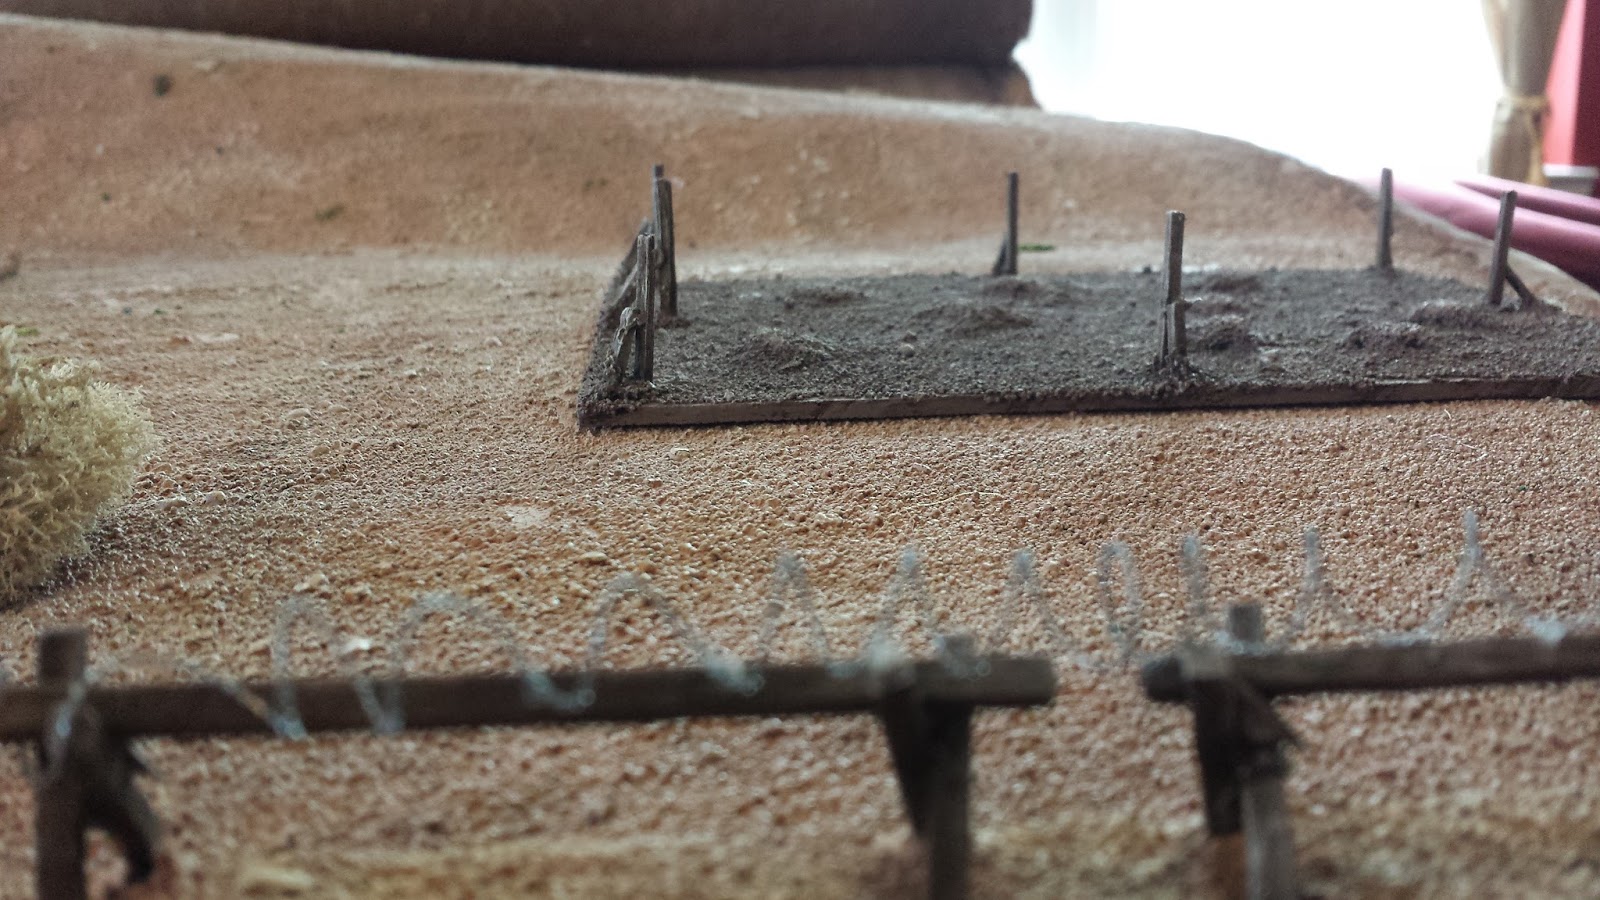
First, barbed wire!  I've been meaning to do this anyway...  tongue depressors work nicely for this. Then a pack of "match sticks", cut with an X-acto knife.


With a glue gun, this is a piece of cake. If I'd tried to do this with white glue, I'd have gone crazy.  Just a few dabs, and everything stood up on its own within seconds.


Two of these little structures per stretch should do it.


I had an extra piece of mdf board (hardboard) sitting around and decided to use the same basic idea to make a minefield with wire around it.


I also wanted a bunker for the battle, so I took a 2" piece of insulation foam, and a foam cutter, essentially a cheap stick of metal that heats up, and cut it out.


It was, predictably, a bit of a pain. I really hate working with foam insulation.


I used the same insulation foam to build the hills for a stretch of trench, but sadly lost the first few images. Basically, this is two pieces of foam, cut into a sloped hill. My cheap foam cutter broke just as I finished the basic shape. I then sanded it down, and glued it to the hardboard base with hot glue.


The sandbags are air-dry clay (it comes black), rolled by hand into long strips like spaghetti, and then cut into small pieces. Cutting them naturally depresses the edges, making them look more like bags with sewn seams. I used more hot glue to glue them down, and then used the rest of the pack of matchsticks for the boards. At that point, I was just breaking them by hand, wanting them a bit uneven, and doing all of the boards probably took less time than my 6 sticks of barbed wire.

Everything is covered with sand before priming, for ground texture.


Primed everything black before painting. The painting itself was nothing special, just my usual Spanish earth colors, with the bunker painted dark grey, given a black wash, and then heavily drybrushed.


Not wanting the trouble of twisting my own wire, I just bought some from Gale Force 1 on Amazon. Attached with some super glue, as it's less obvious than hot glue and dries clear.

One of the sticks broke while in progress, but I decided to leave it, and glue it down for use when tanks press down the wire.


I was surprised by how quick the trench painted up. I painted the earth first, then the boards and the bags with some cheap craft paint, and gave it a quick sepia wash. After drying overnight, I did some light drybrushing, pretty much just one color and then a very light drybrush of off-white.


The trench is a bit oversized. It's probably more truly 28mm scale, but it works for 20s, but only because I added the firing step. I wanted any infantry in the trench to have the option to step down out of line of sight, and back up to shoot.


With everything finished, I added some bits of dry foliage to the piece for flavor.


I wouldn't want to to have to try and take that bunker.


The minefield, being intended for WWII, isn't quite finished (I ran out of wire), but it's not my priority at the moment. I kept it in the final shots for completeness. The bumps are just sanded bumps of wood filler.


This is going to be a hard nut to crack for the Lincolns. Thankfully they have some T-26 tanks moving up in support...