Top Image

Top Image
Showing posts with label Airbrush. Show all posts

Friday, May 19, 2017

Painting Battletech (part 1 of 2)

Ok, the new arrivals are here. Eight new mechs and an artillery piece are ready to go. I didn't snap pictures of the new mechs prior to starting, just the Battlemaster and MadCat below which are left over from the big Battletech Boxed set. The MadCat is just getting primed for now, as we don't play Clan Era games, but it's too cool not to paint, so I'll get to it later. The Battlemaster I will save for another time.

I thought I'd take some pictures as I work and post this tutorial-style as painting yellow is a real trial and someone might find my method useful. All these mechs are destined to join the 1st Argyle Rangers, my Davion force.


Step 1:  Priming.  There's a lot of debate about which color primer to use. However, since we're painting yellow, white is literally the ONLY option. Anything else will turn green immediately.

A MadCat Clan mech, just to show what a primed mech looks like. I don't actually play Clan Era though.

Step 2: Pre-shading.  Some people call this technique "zenithal shading", but I'm not going all the way with it.  Rather than black, I'm using a reddish brown which will look very dark next to bright yellow, but will blend without turning green.  Pretty much anything with any blue pigment will green the whole thing out. Careful which brown you use!  My favorite brown for this is Flat Brown, but the Flat Brown Air color from Vallejo isn't quite as red as the regular, and the regular gunks up my airbrush. Instead I mixed Beasty Brown and Burnt Umber which ended up nearly identical.

Longbow

With the airbrush, I spray from beneath first, getting the undersides of everything, areas where the shadows are likely to be strongest.

Bombadier

I also get the joints, especially the knees, and anywhere where I might want a little extra definition.


Step 3: Dial it back. In order to get the brown into the nooks and crannies, there's going to be some overspray onto areas that are raised and should be highlighted.  The yellow I'm going to use isn't going to turn green if it hits the brown, but it won't fully cover it either.  So, in step 3, I go in with regular white paint, and reclaim the highlight areas, taking a moment to also spray from above, inverting the preshade method. Now the brown is far more subtle, and we're ready to base coat.

Note: If I weren't using yellow, this step probably wouldn't be necessary.


Step 4:  Primary color.  In this case I'm using Vallejo "Gold Yellow" which is darker than I'm going to end up with. It blends very well with brown however, and is my mid-tone.  Here I get full coverage, painting anywhere that remains white and overspraying a bit onto the brown.


Crusader


Step 5:  Back to White.  Turning the air pressure down a bit, I went back to white, spraying only the areas I want to highlight with a lighter yellow color. This is mostly the top of the model, but also in a few targeted areas.

Again, if I weren't going to a super light yellow for highlights, I might have been able to just spray right onto the previous color. Not with yellow. Here's my rule: Don't paint light yellow on anything except white.


King Crab, 100 Ton Assault Mech. It's coming for you Fritz.

Back of the Bombadier.

Step 6: Highlight color:  In this case, Lunar Yellow, also Vallejo Air.  Lunar Yellow struggles to cover even another yellow, but unlike Gold Yellow it turns green when it touches just about anything else.  So, carefully, I go over the white highlight areas.  The highlight is hard to see in the pictures, but it is there.


Hussar Light Mech

Step 8:  Back to White, Again.  This time, the white is for it's own sake, as the final highlight.  I dial the air pressure way back, put in some extra thinner and flow improver (white tends to clog up the airbrush, especially with low pressure), and very slowly apply the highlights.


These look a bit brighter than they do to the eye, as they're under a strong light, but once we apply the wash and detailing it won't be so obvious.  The wash we're going to use (just in the cracks) will break up the surfaces and give the overall mech a darker look.


And that's all for today!  Painting all these with the airbrush took about 2 hours and change.  If I'd chosen another color it probably would have taken half as long, but in my opinion yellow is worth it.

A brief aside... some people out there talk trash about bright "candy colored" mechs. Obviously, I like bright colors for Battletech.  Part of that is the practical fact that the smaller the model the brighter the colors need to be for it to stand out on the table. Battletech is 6mm, and I think it's great to have them in a light color.  I have friends who do 6mm Cold War and paint camo, and the final result is them kind of fading into the table.  Things get forgotten.

But beyond that...  Say you're in the field facing a lance of Battlemechs.  Do you really think you're not going to see that 6 story tall monstrosity because it's painted in a drab camo scheme?  Well, the 1st Argyle Rangers want you to know

NEXT UP:  Wash, detailing and decals!

Monday, April 4, 2016

Terrain Fail

So, a new game and new scale means an exciting new terrain project. Battletech, my current obsession, is 6mm, so almost all of my current terrain is ill-suited for the tiny little giant robots.

For phase one, I decided that I wanted the following:
1)  Farm fields
2) Modular, stackable hills.
3) Tiny little roads
4) Buildings, but more on that later.

So, I had some fortuitous half-days at work this weekend and made a run to Home Depot and Michael's for supplies.  However, as the title of this post implies, pretty much nothing went according to plan.  If you've been reading my blog you know that I love making terrain, and love pretty tables. If you've read my tutorials, it might seem that nothing ever goes wrong.  This post is to disabuse you of that notion.

First, the fields.  Simple!  Free carpet samples from home depot. The longish ones got savaged with kitchen shears.


My go-to brand for serious spray paint:  I got lucky and found two cans on clearance.   This stuff has the best coverage, best color, that I've ever seen come out of a spray can. However, it clogs very, very easily. Like, if you spray on an angle it clogs up completely. 


Look at the color though!  Just what was needed.  However... ALL of the cans are now clogged up and spray absolutely nothing. All of them are almost completely full... Frustrating, but at least I got the fields done.  Ok, check that off - they were essentially free, look decent, and took about 10 minutes total.  The real cost was my spray cans which may or may not be ruined. I will try to soak the caps in thinner...


Next - hills.  I'm going in a direction I normally would gravely resist. I'm not as much a fan of those ubiquitous stylized wargaming hills one sees everywhere, but using 1" foam with clearly defined levels will be exceedingly useful for Battletech so I'm going with it.

I bough a whole sheet of 1" insulation foam for about $8, and everything you'll see below is about 1/8 of the total sheet, so about $1 worth of foam. To cut it, I used the only available foam cutter I could find at Michael's, one really intended more for styrofoam than this heavy duty stuff. But if you go very slowly it works and makes far less of a mess than a knife, while doing a better job.

However, it broke after I got the below done, the wire bending and starting to spark. This is actually my third one of these, and this one lasted maybe an hour. I need another solution. I'm just not going to keep buying these, but the next step up is like $160. I have a pile of foam and no ideas, so please let me know if you have a solution.


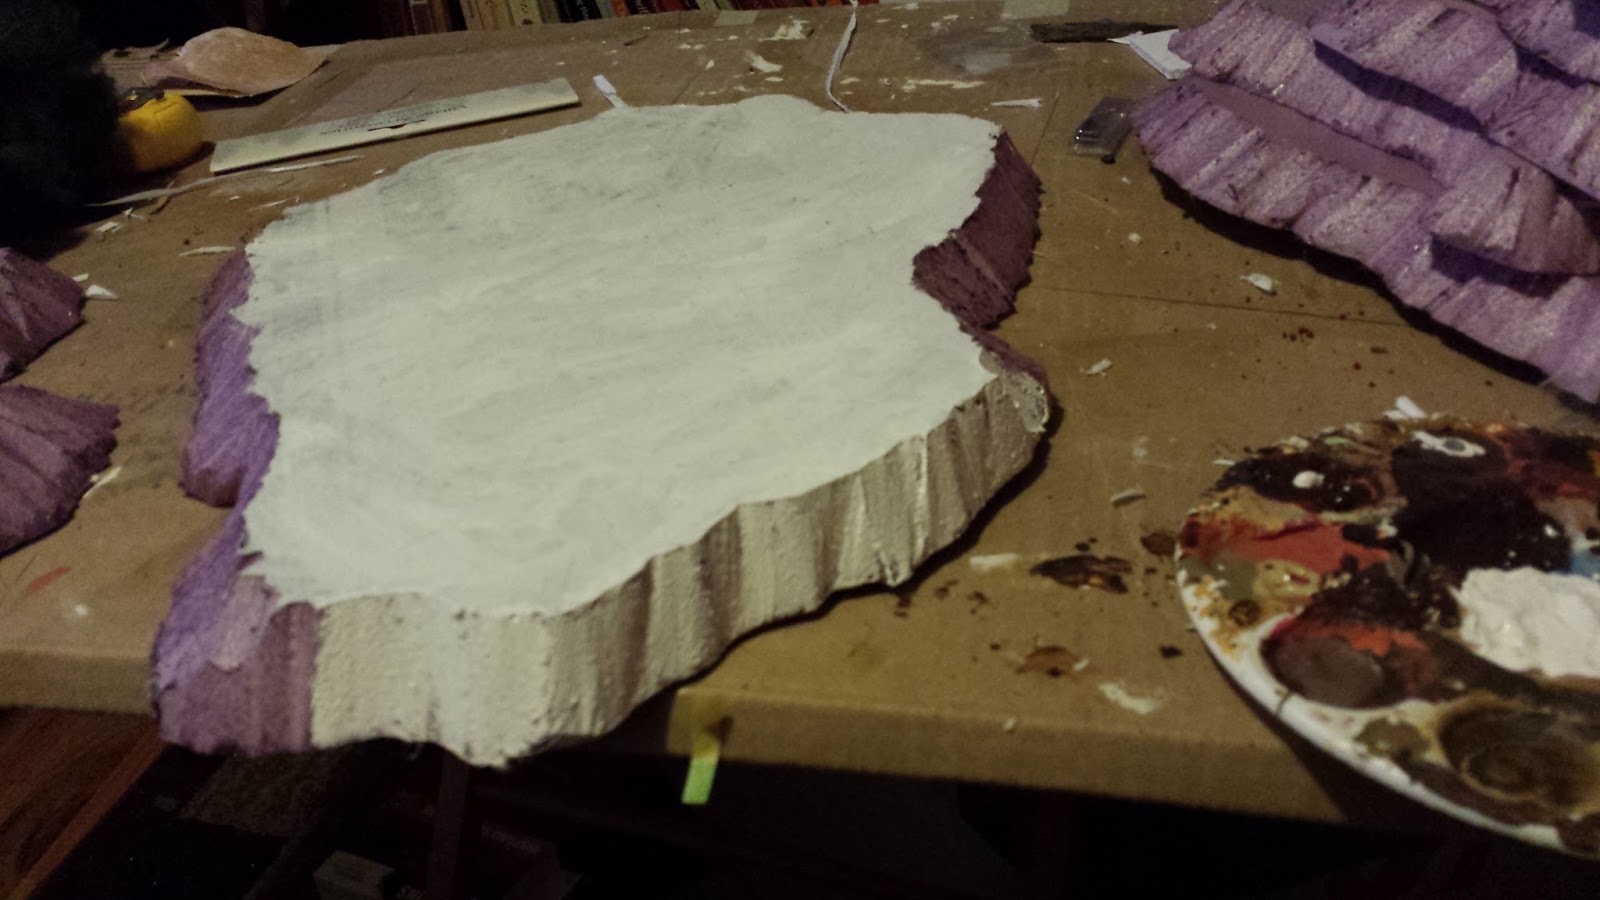
Oh well, onwards and upwards. At least I got a good chunk of foam carved before the cutter's sparky death. Obviously spray primer is a big no-no on foam, so I brushed on gesso.


And then went to the airbrush. Now, as it happens, I got a cheap crappy brush for X-mas, and after a single use replaced it with an Iwata Eclipse. The difference is just insane.  However, for this project, I decided to experiment with using highly thinned cheap craft paints, so I went back to my bottom feed crappy "Master Airbrush".  Ugh, no.  I had to have the PSI so high to suck the stuff up from the bottom feeder that it became a runny, splattering mess.   Bad enough I wiped some pieces off with a paper towel.

So, against my better judgement, I dumped the already thinned paint into my gravity (top) feed Eclipse. Oh man, did it go on smooth as butter.  See?


Oh but at what cost?!?  At the very end, I got a clog, and such a clog it was that I was tempted to write epic poetry to describe it. I shall refrain.

For those of you who don't airbrush, there's a nozzle through which the tip of the needle pokes out at the very tip. It's a tiny little (easily lost) brass piece that is the devil to clean. Well, it was so gunked up that the needle wouldn't come through, which means neither could paint.

After an overnight soak and literally an hour of very careful cleaning, I got the needle to poke through a little, but not to its usual depth. I can kind of paint with it... kind of. But it's not the same, and I have my doubts that it ever will be. So, I have a new nozzle ordered and on the way.

Lesson learned:  NO CRAFT PAINT IN THE AIRBRUSH. Even thinned, it's too gloppy. What do you expect for $1 or less? Hell, I don't even want to speculate about what's even in one of those bottles... So yeah, putting the money out for a couple of more bottles of airbrush ready paint or quality acrylics is the better deal than shelling out $25 for a new nozzle so you can use your $1 paint.

And then there were the roads...

So, I saw someone on line do this, so I thought I'd give it a try. Silicone caulking in strips on some kind of plastic (for non-stick purposes), smoothed out and textured.  Cheap, and what could go wrong?

How about everything?


First off, it's  not so easy to form into road-like shapes. Second, it doesn't dry well on plastic. Third, it doesn't really peel off all that well.  Fifth, it curls at the edges.

Sixth, well just look at it. Does that look like a road to you?


No, more like a bobsled course. After peeling a couple off careful, I ended up just bunching the whole thing up with the plastic and throwing it in the garbage.

What's particularly crazy is that all of this happened over the course of two terrible days. Lets look at the casualties:

- Broken foam cutter
- 6 clogged spray cans
- terminally clogged nozzle
- utterly aborted silcone roads (1 tube caulk, 1 cheap plastic drop cloth)
- wounded pride

On the upside, I love the fields, and the hills will turn out fine, eventually. Hopefully I have an easier time with the buildings...

Friday, April 1, 2016

Painting up Battletech

Ok, I've practiced a bit on some spare tanks. Time to put the airbrush to it's first full army force. And what better for my first airbrushed force than my first Battletech unit?  I'll be jumping into a B-tech campaign next week and I want a force that is both pretty and intimidating to its enemies. I'll introduce the in-character force in another post, but I thought I'd put up some painting pictures. 


One of the things that keeps Battletech from being as popular as certain other games is that its models have a reputation for being ugly as hell. Big clunky robots, some of which admittedly look not much better than the worst knock-off Go-Bots from back in the 80s. It's a fair criticism, although the models from the late timeline, Clan Invasion +, are often much nicer. But that's not what Fritz and I are playing. We're playing our favorite fluff period, the late Succession Wars... which also has the worst looking models.

When my wife saw my assembled force unpainted she was distinctly underwhelmed. She said something like "Martians I get, and the Spanish Civil War is fascinating, but this... this I don't get." She admitted to not being exposed to giant robots as a kid, so that makes sense. She also straight out said she thought they were ugly. So, naturally I had to prove that they don't have to be ugly.

However, before that could happen, the wife "accidentally" dropped A Game of Thrones on the assembled figures while re-shelving it, breaking several of the figures. She felt really bad about it, but I have to wonder if something was happening under the surface... some unconscious aversion.  In the end we agreed that it wasn't really her, it was George R.R. Martin that couldn't be trusted, mostly to keep the peace.


I selected a 4-mech lance, along with a combined arms force (infantry, tanks and air support), and also received some additional stuff as birthday gifts. The mechs I selected tend to eschew the more huminoid form, and in fact none even have hands.  I have to admit that I selected the mechs mostly for looks, except the Jenner which I love to play, and the Marauder so I can do my Khyron voice (Robotech reference).

I also have a thing with attacking giant robots with infantry. So VTOL transport was necessary.


Ok, time to make them  pretty.  I decided that my character in the campaign will be an arrogant Davion noble trying to make a name for himself. So no camo color schemes!  This guy wants everyone to know who he is.  What better way to be noticed than charging into battle in bright shiny yellow?

I know what you're saying - "yellow? Are you MAD?  Yellow is the hardest color in the universe to paint!  You're a noob with the airbrush!  Yellow doesn't FORGIVE. Yellow is CRUEL. Yellow is a MONSTER."

Well, experienced painter, you're quite right. Yellow is straight out UNPRINTABLE in how much of a pain it is. But oh, is it worth it if you get it right.  The key is not to mess around with the blending.

I primed them white (no choice with yellow), then hit them with Vallejo Flat Brown where I wanted to shade them, followed a few minutes later (I love the airbrush) with Vallejo Air Gold Yellow.


For highlights (and to back off the shading which was a bit overdone), I went at it with a plain white.


Followed by a reapplication of the base color, leading to a more moderate fade.


After that, a much lighter application of white, just where I wanted the highlights to be, and then went over it with Vallejo Moon Yellow, a very light and pale yellow that doesn't cover anything unless its white. On top of that, a fine mist (low PSI, lots of air, little paint) of white on the highest lights.

At some point in there I also very carefully applied a Sepia wash to all the little cracks and grooves, which really brought them out. This wasn't a heavy wash at all - I had to be careful not to get any on the raised surfaces, as covering any splotches would be impossible (friggin' yellow).


With the airbrushing done, I broke out some Vallejo Dunkelgrau and started picking out details. I also, with a LOT of trouble, masked the Marauder and did the red with the airbrush. I like it, but it probably would have been just as good and quicker doing it by hand. I suck at masking right now.


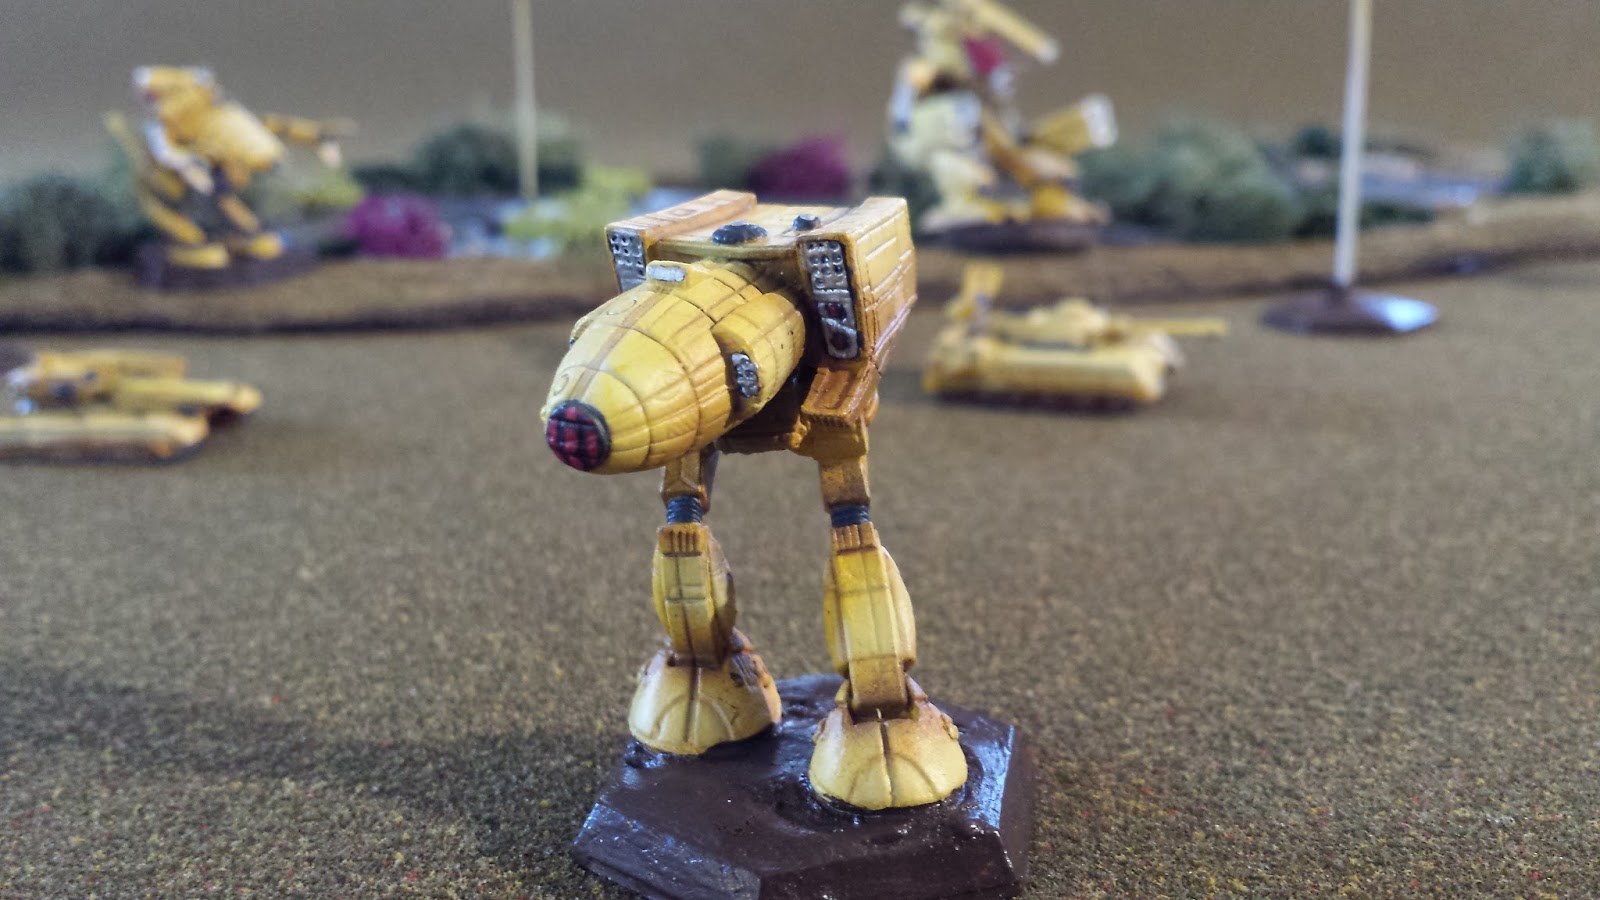
Looking pretty good so far!


The air stuff fell behind during all this as they are NOT easy to attach to their bases. None of the holes were big enough to support the stems, either on the model or the base. I bought a jeweler's hand drill, and broke it in under 5 minutes. Then I broke a file.  Finally, I just got out the power drill and that did the job (along with a bit of green stuff and super glue).  After they were primed, they got the same treatment.


Then it was just a matter of standard detailing. As was perhaps inevitable, I occasionally went over the lines, and bits of paint got on the yellow. There was literally nothing to be done. Any attempt to fix it would just have made it more obvious or just plain worse. Still, not to many mistakes, and no deal-breakers.


The final step was Vallejo Satin Varnish, which was my first use of it and I must say it's amazing. I was afraid it would be too shiny, but it's a very silky, subtle effect, and one that seemed to especially suit my color scheme (and mechs in general).


Even the wife had to admit that they turned out looking very good, and suddenly she's more enthusiastic about my Battletech project.  Personally, I'm more than pleased.  For me, these represent a new high water mark in my painting.  The airbrush really is a game-changer.


 Below, an image to give Fritz nightmares.


And yeah, I even painted my infantry.  It didn't actually take as long as I thought it would - the longest step was painting the base.


I'm particularly happy with this guy.


 Next, I need to do something with the bases (usually I do those first, so I'm a bit lost), and finish up my fluff on these guys.

Thanks for reading, and George R.R. Martin, if you're out there, you need to know that these men are not loyal to House Stark.  Leave them alone!