While my milicianos might not agree, the Church is inseparable (for better or worse) from Spain's long and fascinating history. Anyone doing a bit of Spanish wargaming, whether the Spanish Civil War or the Napoleonic wars might benefit from a bit of ecclesiastic terrain. Beyond that, a church like the above could also be used for other areas such as Italy.
I knew I had to make something like this, but honestly I was a bit intimidated. This is by far the most elaborate and labor-intensive piece I've built yet, but I'm proud of how it came out.
I started with plenty of obsessive sketching. Here's the one I went with, scrawled on a piece of scrap paper with some rough ideas of measurements. I played around a bit with the proportions, as I started with the base. I cut a piece of mdf with a hand saw (the last time I'll ever try that one) based on a rough idea of the maximum footprint I'd want on a 6'x4' table, and kind of just fitted everything to that.
The church is meant more for flavor or as an obstacle to line of sight than as a fire base for troops. In a Romanesque church like this, the windows in the clerestory are unreachable by any troops inside (they're also alabaster rather than stained glass). Soldiers might sleep inside this place, but it's a poor position to shoot from. Thus, I decided to make things easy on myself - the roof would
not be removable. If it had been, not only would it have been more difficult to design, given the interlocking slanted pieces, but it would have taken twice as long to fit out and paint the interior.
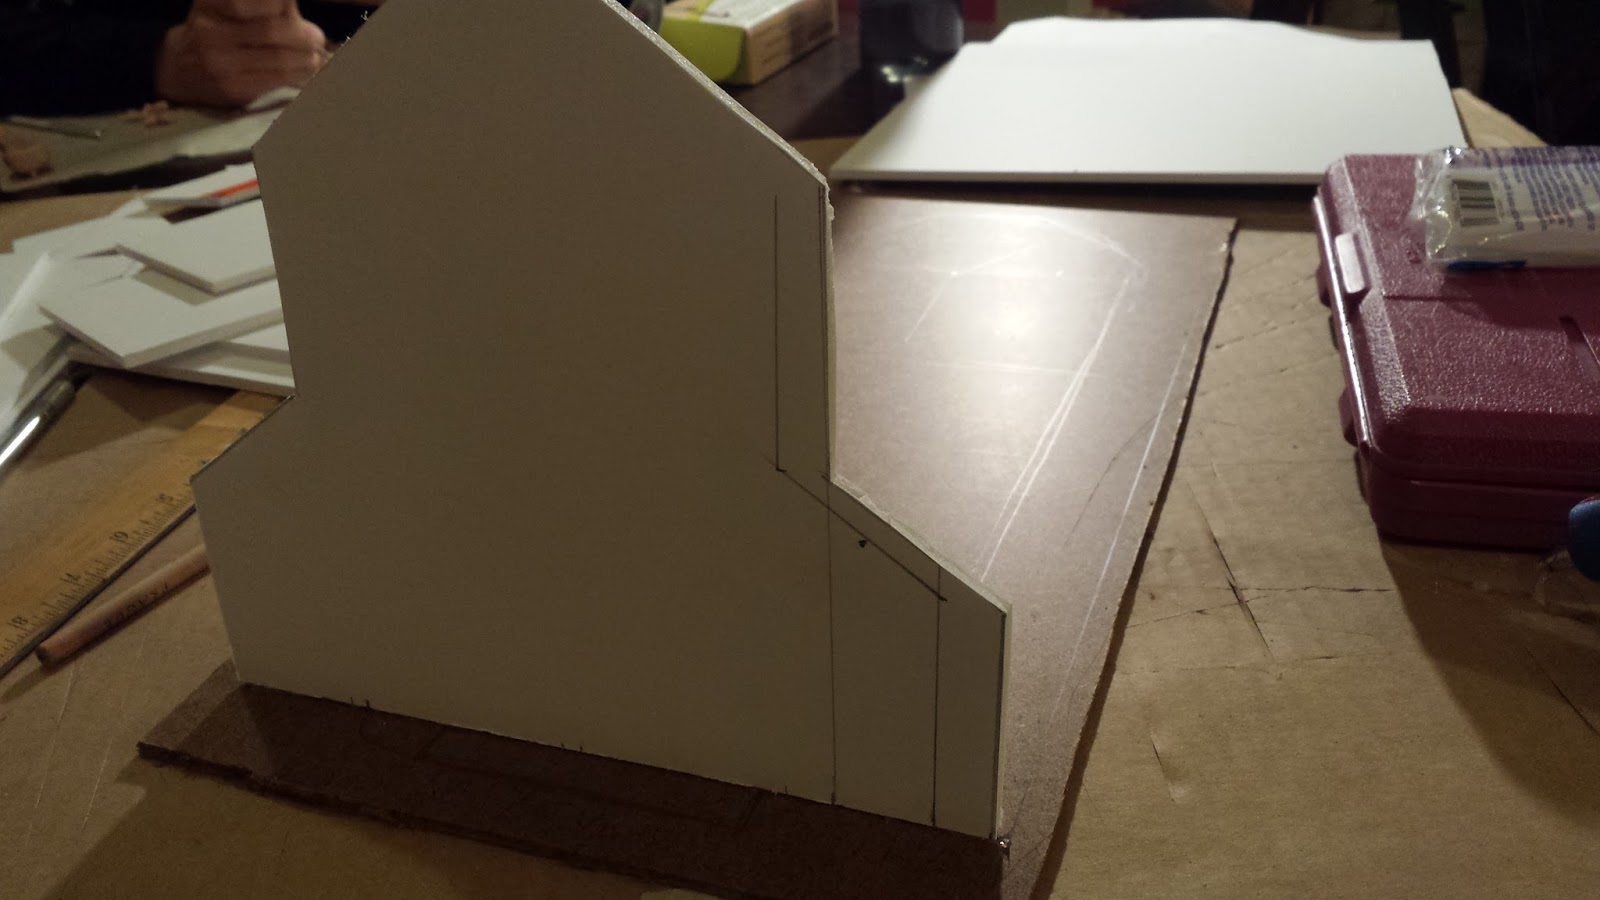
I cut my pieces from hardboard with an X-acto knife, trying hard to measure more accurately than usual, but even still many of the joins were a little off. Thankfully this technique is very forgiving.
On this project I used a hot glue gun for the first time, and I'm happy to say I'll be using it on pretty much everything I can from now on. It's a bit messy, with a bit of cleanup (those thin strands that end up everwhere are a bit of a pain and very hard to see), but the gun allows you to work at an incredibly fast pace. No pinning walls together, no superglue, no long PVA wait times to move on to the next piece. Nope, I assembled most of this in a few minutes. The cutting took far longer.
The apse is a half octagon, and after experimenting with trying to actually measure angles and draw a polygon
a la Euclid, I eventually just said "screw it" and eye-balled it.
Of course, no church is complete without a bell-tower. I decided to make it separate from the church for two reasons - storage and the potential for use on its own. I've played around a bit with 2" insulation foam sheets, but this is the first building I've tried to create with it. Cutting two 4" wide sections of equal length using a foam cutter (picked up at a craft store, and much easier than using a knife or saw), I sanded them heavily, and then glued them together. I then cut the top bit off and carved out the arches and cavity, which would be the only area that is open for troops.
Overall, it wasn't that hard, but I'm also not 100% happy with the end result. Those arches were a pain, and did not come out even at all. The choppy cuts created by the foam cutter thankfully kind of work for this piece (and a knife would be worse), but I'm not going to be in a rush to use this material for other buildings. Foam core is much easier, although in this case it would be less durable.
As I worked, I decided to use some extra material to very quickly make an additional structure. The idea was for a multi-story, multi-family house with removable roofs. There was little to no real measurement involved here (which sadly shows in the poor slope of the steep roof), I just wanted an extra piece quickly. It would go through all the same stages and colors as the church, so really it was just about efficiency. A nice bonus for little extra work. In terms of "how to", this is almost identical in construction to my
farm house (except quicker with hot glue).
This is where I stood at the end of my first session of work. The three structures built up took about four hours, from cutting and measuring through assembly.
The next day, I sealed up the windows with card from a box of cotton balls.
I also added some details to the tower using the cut outs from the church windows.
I then tiled the base using the rest of the box of cotton balls.
A few days later, I was able to get started on the roof. I started with a very heavy sheet of card I had laying around, cutting it, fitting it, and frequently trimming and messing with it until it sat right. Again, precise measuring isn't my strong suit. I don't know, maybe I'm not holding the ruler straight? Whatever, it got done.
The card needs to be heavier than the thin stuff I used for the windows for several reasons. I need to avoid sagging, and of course damage from handling or transport.
I'd been playing around with the idea of a cross topping the transept and I even had the perfect piece for it. In the end, I decided to leave it out, partially because I felt a little weird about it, but mainly because the cross took the church higher than my usual transport box, making the piece very inconvenient. Oh well, not every church has it.
Time to make some terracotta tiles! For this, one-sided cardboard is needed, cut into strips. In this, I learned an important lesson - perhaps I can save you some pain with it. So, peeling one side of cardboard off isn't as easy as it sounds. I spent way too much time trying to peel big sheets of the stuff, even trimming with knives. After far too long, I gave up, realizing just how much roof this project had. I began to search for store-bought one-sided cardboard
everywhere.
Apparently, in my area one sided cardboard cannot be had for love or money. Thankfully, I ended up asking a random store owner and he happened to know how it could be done. It was a rainy day, and he said "go behind the liquor store, they leave boxes out there, and they'll be soaked by now, so one side should just peel right off."
And lo, it was so. Easy as anything. It took another day to dry before it was usable.
The strips are hot-glued on in overlapping layers.
With construction complete, it was time to smooth over the rough spots with spackle. Mostly the joints where foam core, the cardboard, or insulation foam meet. This is all sanded down when dry.
Now, I was a bit worried about priming. The foam core would be no problem but the tower could seriously melt under the spray of the primer. To try to prevent that, I first covered the whole thing in a coat of gesso, and then applied a coat of Martha Stuart brand "stucco effect" the exterior of the church, tower, and bonus building. You could just as easily water down some spackle for this, but I picked up several tubs of Martha's stuff on clearance for next to nothing.
Painting: the colors are consistent with the rest of my "Making Spain" series, so that everything would tie together nice on the table. So, the base coat is Craftsmart "Golden Brown", "terracotta" for the roof, and "Honey Brown" for the tile floors and inside the windows.
Once the base coat was dry, the whole thing got a heavy application of sepia wash.
Then my favorite part - drybrushing! It's like magic the way the details start popping out. For the walls a heavy drybrush of "fawn" color, then a lighter application of "desert sand", and finally "wicker white" only on the highest details and edges. On the roof, "terracotta", "chalky orange", "yellow", and lastly pure white.
Oooh!
The last detail is the rose-window. I was a bit stumped on this actually, debating about trying to draw in some lines, but decided that a more ambitious solution would pay off here. It ended up being very easy. I cut a circle to fit inside the window first.
Then eyeballed some roundels.
...cut them out with an x-acto knife...
...and made sure it fit. Not bad!
I painted it up with the same colors as the church and glued it in place.
Finished at last! Only took about 3 weeks or so. I don't want to think of the total number of hours.
Hey, are those Moroccan Regulares down there!?!
The quick and easy bonus piece. Given I only worked on it when working on the church, it really took very little extra time to bang this piece out.
I also glued in a "bell". I couldn't find a bell that was the right size, so I bought a cheap candle-snuffer, and broke the snuffer off and shoved it in there with some glue.
Overall, I'm pretty happy with the project. As I worked on it, I got progressively more ambitious, and have a few other pieces to complete the churchyard. I'll post those as well once they're finished up in a few more days.
Hope you enjoyed!