Top Image

Top Image
Showing posts with label Cold War Commander. Show all posts

Sunday, February 14, 2016

"Negative" vs. "Positive" Activation Rules (and Cold War Commander Review)

It appears I've played my last game of Cold War Commander. When my buddy Michael taught me the game, I was excited about it and wanted very much to like it. I'd been wanting to get into larger scale battles (battalions, regiments, etc), and this seemed like just the thing, with a professed combined arms focus as well.  However, after about 5 games of it, I'm pretty much completely done with it. I've had victories, defeats, and draws, but no matter the outcome, I walk away a bit frustrated. I thought it would pass, but it hasn't, and so, I'm sorry Cold War Commander, I'm breaking up with you.


Michael, who's a big fan of the game and even plays it solo sometimes, is an excellent host, and I feel bad saying goodbye to his favorite game, but fun must come first, and I'm just not having fun. In an effort to explain why to my friend, I isolated a couple of things, the main thing being the rules to activate units.  I haven't been wargaming for decades like many people I play with, but it seems to me that there are three broad ways to handle unit activation in a game:  "I go-you go", Negative Activation, and Positive Activation.


We're all familiar with "I go-you go" rules:  one side activates all of their units, sometimes in whatever order they want, and then the other player goes. Obviously, this is far from realistic in the way it reduces the battle to two large men taking turns punching each other as hard as they can until one falls over.  It can be plenty fun of course, (as in All Quiet on the Marian Front) but most tactically-minded folks seem to eventually prefer something more interesting when they can get it.  For convenience sake, I'll even include games like Wings of Glory (or Battletech), where both sides actually act at the same moment (and to a degree even X-Wing, where pilot skill determines the order of activation), as both sides essentially get the same chance to act, and all intact units can do whatever their abilities allow every turn.  I've actually seen CWC described as I go-You go, as one side takes as many activations as possible and then the other does, but as there is a limiting factor to the activations, I prefer to think of it differently.

The other two types I've lumped together are "negative" and "positive" limited activation rules. Both are an attempt to improve over the "I go-you go" type by limiting what you can do in a given turn. These rules recognize that you can't always coordinate everything on a battlefield perfectly, and limits the units activated on any given turn. This strikes some as less fair, but of course, there is often the same chance of activation on both sides, and if there is a disparity, most rule sets give some kind of benefit to level things a bit. I'm of the opinion that limitations like this are desirable in most cases, but there are two very different ways to achieve it.


"Negative Activation" -  So, say you want to move or shoot with a tank or something. In negative activation, you try to activate, usually with a roll, and sometimes you can do what you want with the unit, and sometimes the dice say "nope, your tank is going to sit right where it is and spin its treads." A good example of this is Cold War Commander, where you can activate a unit over and over on your turn, until you fail your roll. That failure can happen on the first, or on the sixth activation, you never know.  I've had games where a tank company's commander fails to activate for entire game, forcing the overall commander to activate the company and move it to the fight, all while the inactive command unit is literally sitting at the table edge as the rest of his unit reaches the other side of the board.  So much for "simulation". Lion Rampant (which seem to be quite popular lately) uses these rules as well, and I've seen some griping about it online which makes me suspect I should find a different rule set if I dive into a medieval setting.

Positive activation works differently, limiting you by using mechanisms like cards or dice that are drawn either for each unit, or determine the order of activations during a phase.  Examples of this type are Bolt Action, where both sides have a die per unit all in one bag, and one die is drawn to see who goes next (allowing the possibility of one side going several times in a row), but leaving the choice of which unit to activate with that die, and with the knowledge that all units will eventually activate.  Similarly, in IABSM, the units form a deck of cards, and you activate the unit which you draw, but may not get to activate every unit on a given turn (there's a "tea break" card that ends the turn somewhere in the deck). Or, as in my current favorite rule set, Chain of Command, you roll a set number of dice (typically 5) that you can then use to activate various units depending on the numbers rolled. You roll the five dice, and within certain limits, make the best of what you have. If you have lots of units, you may not be able to activate them every time, but once you roll the dice, you'll at least know for sure what you can do. Sometimes, if you roll lots of sixes and fives, you can't activate as many things, but you either get several turns in a row (6s) or advance towards a CoC die and the various tactical options that brings. You may not be able to do much, but you won't be stuck doing nothing either.


I also feel this is a huge improvement over Bolt Action, as once you roll you know you can, say, activate a squad, a junior leader, and a team, and thus you can have your units support each other in a way that is impossible (except by blind luck) in BA. For instance, given the above roll, I could activate a tank's driver as a team, telling it to advance on the road, while activating a squad's junior leader to follow the tank closely, using it as cover. Try that in Bolt Action, and if you draw one of your opponent's dice after moving the tank, they will find your squad still 20' back from the infantry in the open until you can pull another dice to move them. There's no way to do two things simultaneously.  Yet I still prefer Bolt Action's "positive" activation to CWC's "negative".

To me, what makes the positive activation superior is that the activation method limits your resources, and then allows you make your choice of how to work with limited options. I call the former negative because it allows you to make your choices and then limits you by sometimes saying "no".  I find the latter to be psychologically less fun, and leading to far more annoyance.  Perhaps others agree, perhaps not. But for me, this feeling of positive choice, of being able to make a plan to work with what you have (even if limited), is far more fun than trying to stretch your brain to explain why one of your tanks is still sitting on the table edge watching the rest of the battalion get torn apart. If that tank is sitting there, I want that to have either been a conscious decision, either because I wanted it there or because I chose to spend my resources elsewhere.

I guess what this comes down to is that I don't like being told "no" arbitrarily. Tell me what I can do, not what I can't, and I'll happily try my best to solve the tactical problem at hand, and enjoy myself win or lose.  I don't mind being denied, but I'd ultimately prefer it be my opponent, and not the rules, which do so.


Another issue I have with CWC is the way it handles reactive (opportunity) fire. I admit to limited experience with this mechanic in games outside CWC and perhaps CoC, but I've seen others gripe about this online so I know I'm not alone here.  Essentially, in CWC, any unit that is not "suppressed" by previous enemy fire, may interrupt an opponent's action and fire in reaction. Frankly, I'm not as clear about why this doesn't work well in this game as I am about the activations. I can only give you the result: paralysis on the game board. It may be because every unsuppressed unit can do this. Certainly in CoC you have to spend precious tactical resources to do it, whether by putting a unit on overwatch, or spending a CoC die on an interrupt or ambush. In CWC, it again feels more "negative".  Certainly some kind of mechanic like this makes sense - if I'm moving my tanks into a better position, you probably do have an opportunity to fire while I do so. Yet, you could do so if I remained passively right where I was - but not in CWC. I can just hang out where I am ("if I don't move they can't see me"), you can't shoot at me, at least not until your turn. And if you do fire on your turn, I can use reactive fire to fire back then.  In the end I find the way the mechanic plays out limits options too much and drags the game down.

What I DO like about CWC:

I do like the combined arms focus. Planes, choppers, artillery... these are well done and appropriately deadly and chaotic.  Admittedly, I bomb my own troops WAY more than is statistically likely, but I've laughed every time, because even that is kind of fun. If only the rest of the game was a bit more fluid on the table, and a little less arbitrary and frustrating.  I also like the rules for botches - double ones force a roll on a very fun "bad things happen" chart.

So Cold War Commander, adios.  Michael is accommodating me, and we'll be trying Fist Full of TOWs next for our 6mm Cold War games.  I'm hoping it work out better, and I have a feeling it will.

Saturday, February 13, 2016

Pushing through Fulda Gap: 1984 (My Last Game of Cold War Commander)

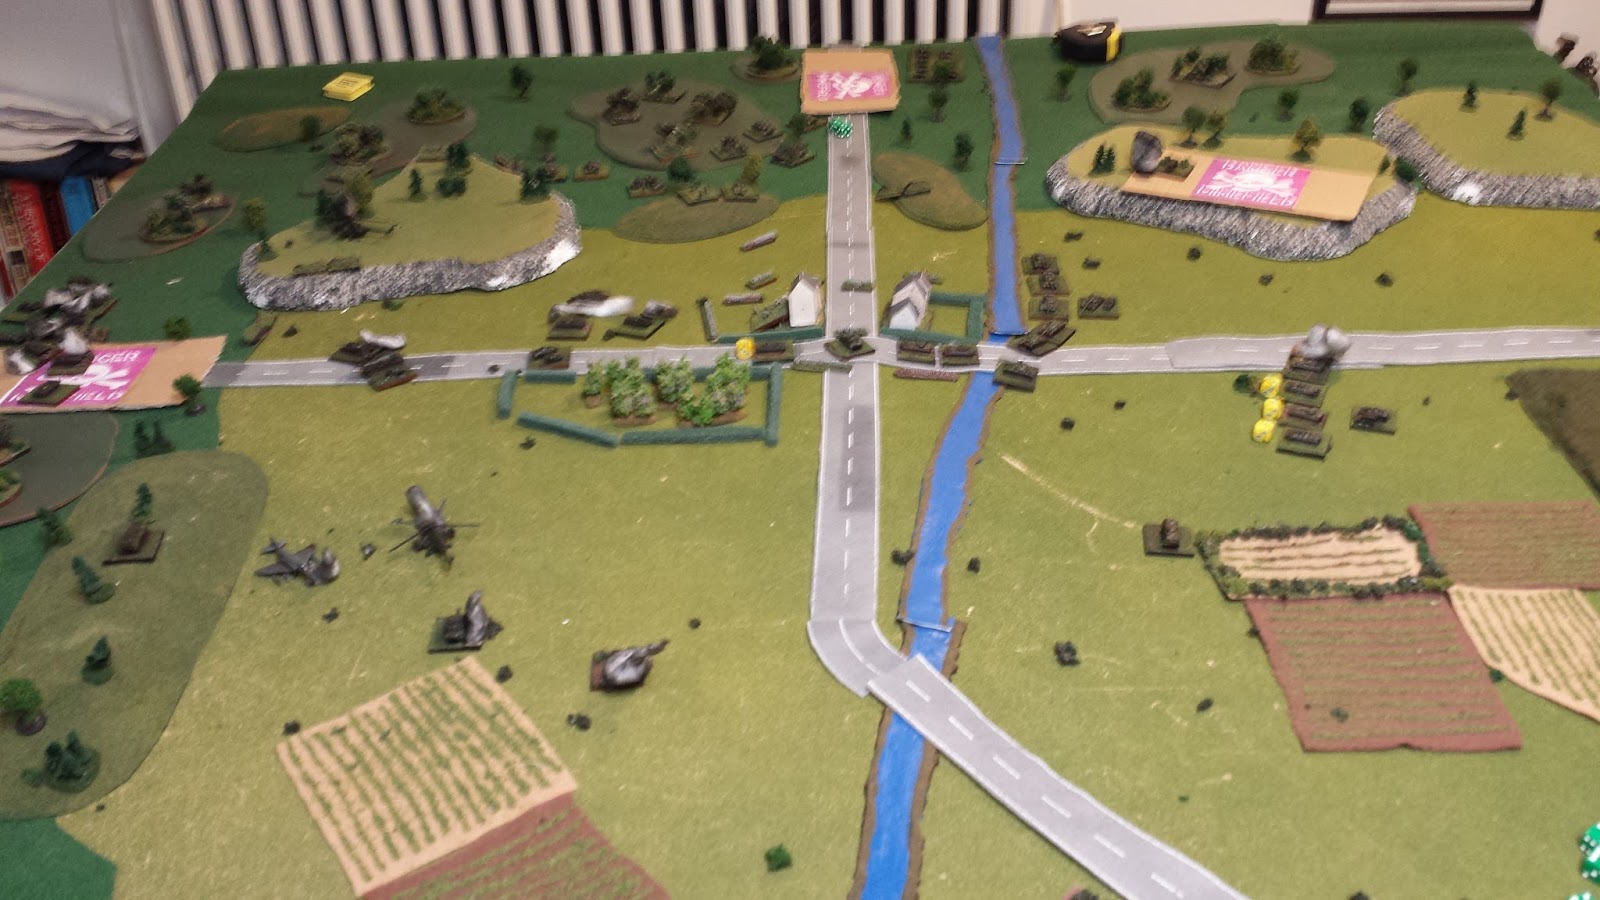
Back to the 80s with some Cold War Commander. In the last game, the Soviets broke through at some cost, and now they are advancing up the main highway to Fulda. The highway runs through a narrow valley, and has two small towns strung along it. The Soviet objectives are to take the town and proceed to the far table edge.  A small US force is hidden in the area, force composition unknown. Onwards for the Motherland!


An infantry battalion in BMP carriers advances rapidly towards the first town while the two tank companies screen their right flank. Soviet artillery tries to shield their movements by covering the nearby hill with smoke.


However, due to the incredibly annoying CWC activating rules, the BMPs pretty much ended up as sitting ducks for an impressive array of American artillery and air power. Unable to get my main anti-air assets out of their friggin' trucks, there was not much to do except sit back and watch most of my infantry burn alive in their transports.


My opponent and host Michael had fewer points to build his force but chose them well, fielding a contingent of Abrams tanks as his main on-table force. In a risky move, he'd hidden them on the left (behind my smoke screen), and was able to activate them enough to get them around the smoke and onto another hill. He had a perfect shot of my tanks' side armor, but wasn't able to take the shot, due to those very annoying activation rules.


However, the way opportunity fire works in this game, the moment I try to turn my tanks to actually be able to shoot at the Abrams (Russian tanks have a more restricted avenue of fire - apparently all of their turrets are broken), Michael will be able to shoot his whole line, even though he wasn't able to on his turn.  I have three choices: shoot with maybe two tanks against one of his, try to wheel the line to face the Abrams, or try and push straight past them. All three options meant weathering a full round of fire.


The enemy also dropped some smoke to limit return fire on the Abrams.


Michael had selected my force in advance, and had given me a sizable airborne contingent mounted in two helicopters. A questionable choice in the face of American air superiority. I decided to send them in to try and distract my opponent from the main event.


Predictably, one of the choppers is shot down, losing half of the airborne force in the crash.


Meanwhile things on the right flank proceeded pretty much how I thought they would. Between artillery fire suppressing one of the two companies, and opportunity fire from the American tanks, I managed to get a single tank platoon clear of the trap, with one other platoon destroyed by fire and the other suppressed.


Knowing I needed some help, I had my HQ call in some air support. The chopper flew in to engage and, as seems to be de rigueur for me in CWC, it bombed my own tank platoon, destroying it.


The Abrams tanks moved out to finish the job.


But honestly, the game was already over, thanks to absolutely punishing artillery fire which wiped out my entire infantry battalion before they could manage to activate and dismount.


Calling it a night after a very short game, Michael revealed his devious strategy. Putting nearly everything into tanks, the only thing occupying the villages was a single HQ unit.  A very risky strategy, but it worked out in this case.


The only other unit he took was an infantry company poised behind the hill on the left to react to my moves.  It was a very savvy and admirable strategy, but as much as I admire it, I felt positively hamstrung by a combination of the uneven knowledge available to both of us, and the rules themselves.


Losing a game can be a very fun experience. I've played epic games that resulted in total defeat, had desperate last stands against overwhelming odds, and led massive offensives that were blunted and taken apart by a wily opponent. But this game felt very different. Part of it was, I think, the rules of CWC itself, which I think are overall rather bland and lacking.  Part of it, sadly, was the way this scenario was developed by my buddy Michael, although I don't want to blame him much for my experience or undercut the wonderful work he did to bring the scenario to life.

Essentially, thanks to him being an enthusiastic host and preparing everything in advance, he had unintentionally given himself an unbeatable edge. He knew his force (which was deployed hidden), my force (which, to save time, he selected), and created the scenario and table with several weeks to go over it in his head.  I knew only my force, which I didn't even choose, and nothing else. I was doomed before we started.  In future, if someone picks my force, I'll insist on having the same info on their force, just so things are more or less even.  

Something we should all keep in mind as we prepare games for our friends I guess.

I'm not one to rage-quit a game, and I played it out to the bitter end (although from the 2nd turn it was clear there was little point in doing so), but this was probably the most frustrating single session of wargaming I've ever had. After four or five games of Cold War Commander, I'm realizing that, scenario aside, I find the game mechanics frustrating, win, lose, or draw. I've given it a solid shot, but I don't think I'll be returning to this rule set anytime soon. It's largely personal preference I imagine, but it is what it is.  I'm learning what I like in a rule set, and just as important, what I don't like. In my next post, I'll post my thoughts about CWC rules, and make some observations about how other rule sets handle the same issues differently.


Monday, November 16, 2015

Fulda Gap, 1985 - Cold War Commander

The order has finally come. The forces of the Motherland are prepared to end the long stalemate with the United States, tanks pouring into Fulda Gap in Germany. The ultimate objective is Frankfurt and the major airfield there, but first the lead battalions must clear the way.


Michael painstakingly put this excellent scenario together (including the map below), and sent us the following intelligence report a few days before the battle:

"1. The Americanskis have had many years to prepare this area for defense. Be prepared to deal with any and all available defensive measures
 
2. It is anticipated that the capitalists will deploy up to a battalion to defend this area and fight a delaying action.
 
3. Your objectives are
a. capture and hold Brand - recent intelligence photos show that their is a bridge just West of Brand and not east of Dietges - minor
 
b. Capture and hold Dietges - minor
 
c. Push at least 1 BNs of the east edge of your area of operations using highway 458 by the end of turn 8.
 
Good Luck!"
 
We'd need a bit more than luck it turned out.
 
For this battle, Michael played the American defenders while Roxanne (a new gaming bud) and I played the Soviets, splitting the sizable force. We weren't sure of the American strength, but we deployed 7500 points, including extensive artillery and air assets (mostly helicopters), despite having less than ideal air superiority.

 The minor objectives are the villages of Brand and Dietges while the main objective is the western reaches of highway 458 (the American table edge), which lead ultimately to Frankfurt. Here's how it looked on the table from the Soviet edge:


The small village of Brand is in the foreground and Dietges is at the crossroads in the middle of the board. Dietges has been prepared with plenty of wire in an attempt to slow down the Soviet advance.


The Soviet left is the edge of a vast German forest, limiting visibility, and the forest continues into the American sector, along with plenty of hills and cover which we can expect the Americans to make use of. Recon has shown possible enemy locations (the white blinds below).


The river is not fordable in this area, and thus the bridges become our concern. Roxanne took an infantry battalion and the weaker of the two tank battalions. I took an infantry battalion, a tank battalion, and the overall HQ. I decided to attempt to flank with my infantry from the left (on the road), while deploying the tanks in a broad line to begin with.


Roxanne deployed all of her forces on her side of the table.


Roxanne advanced far more cautiously than I, slowing down to move her tanks through the hedge row, allowing time for her infantry to dismount and capture the town of Brand.


My tanks pushed forward quickly, trying to get the Americans to reveal themselves.


Which they did.


A single tank platoon began firing from the cover of the village.


Followed by the first American air strike. Which destroyed two platoons of Roxanne's infantry.


Two more tanks began firing on my tanks from prepared positions on the left.  Those fortifications, combined with the front armor of the Abrams, made it unlikely that I could knock these tanks out from the front.


Not for lack of trying though... lesson learned. Don't waste shots like that.


From the American point of view.


I began calling in helicopter support, trying to dislodge the tanks on my left. I hoped to soften them up before bringing in my flanking attack. Sadly, it wasn't enough to do any real damage.


The answer must thus be... more air support! Another chopper is called in.


But not so lucky with the American anti-air this time!


The surviving chopper withdraws to rearm while an American jet tries to attack my tanks.


Thankfully I too had considerable anti-air assets. As we learned later, this was a considerable set-back for the Americans. They had no additional air to call on.


At this point, all of the action was on the left, where my tank battalion was being stymied by two mere platoons of Abrams tanks.


Further chopper strikes  resulted in a miscommunication with command. The helicopter went a bit too close to the American lines...


With predictable results. Michael commented that he'd never seen so much destroyed air in a came of CWC.


Seeing that my attack on the fortified tank position was going no where from the front, I decided to try to bring on my flanking infantry in BMPs into the fight and attack the tanks in the rear.  Which Michael had been apparently waiting for...


A minefield!  I didn't even know the game HAD minefields!  Can't say Mike didn't warn me that the Yanks would have all sorts of prepared defenses.  Ouch. My BMPs drove right onto it. Most of them got bogged down, meanwhile several platoons of infantry (including an AT unit) ambushed the forces that weren't in the mine field.

A minefield and an ambush at the same moment!  Well played Michael, well played...


Roxanne hadn't been idle in all this, and after leaving a detachment to hold Brand, positioned the rest of the infantry to rush the crossroads. Her tanks began to push forward into the hills to reveal the Americans there.


American artillery dropped smoke on my tanks to prevent them from putting their fortified tanks in a crossfire with my BMPs.


Sadly, the BMPs were doing rather poorly with the mines as well. Still, their presence forced Michael to withdraw his tanks deep into the woods. The ambush was largely fought off, but at significant price. I would say Michael's plan on the left was entirely successful. I feel a bit like a dupe for falling so easily into it. 


Roxanne dropped smoke of her own to allow an easier approach to the town. For the early part of the game her artillery had been scheduled to pound the crossroads with H.E., so the forces there were already weakened.


Her recon unit discovered a second minefield on the hill (and the cost of its own life), and her tanks began to move around it. I have to confess that at this point I had no idea what she was doing. Turned out to be a solid move though.


On my side, the smoke cleared, and with the game getting close to ending it was time to aggressively push forward toward the major objective (the highway end).


Sadly, it was nearly impossible extricate most of my infantry from the minefield.


I started pushing my tanks (still largely intact) towards the enemy position on the road, while Roxanne looked to cover my approach.


Her tanks maneuvered around the minefield and took position on the hilltop overlooking the line of Abrams blocking my path. Well played Roxanne! It was the only position close enough to the enemy (10cm) to see them in the woods.


So naturally the Americans dropped more smoke, making it so no one could shoot at each other.


Moving into the endgame, the Americans have successfully fallen back to their secondary positions and retain most of their strength. It was pretty sad how little damage all of my tanks had been able to do.


My tanks moved towards the final road, getting around the enemy which surprisingly didn't shoot as I passed them.

Oh, that's why.


Another minefield, this time blocking the table edge. We rolled to see if the tanks spotted it in time, and sadly, they did not. We determined that they were caught up in it, and with it being the 8th turn, knew that they had failed to capture the main objective.


However the lone BMP that I'd managed to extricate from the minefield made it into the town, as did several of Roxanne's.  Unfortunately, due to the successful holding action of the Americans, we weren't able to dislodge the single infantry platoon that held one of the blocks of houses. The objective would be considered contested.


With one town held by the Soviets, one contested, and the highway not secure, the battle was a minor American victory. The Soviets clearly held the field, but they weren't quick enough to push through to Frankfurt before significant reinforcements could be flown in. 

A very fun game, full of surprises (those minefields!).  I must say I learned a lot not only from how it went down, but from watching the two far more experienced wargamers (both of whom also have actual military experience). Roxanne's moves were quite savvy and Michael's defensive plan was rock solid, despite having a far inferior force. I was a bit over-aggressive I think, and I underestimated the kinds of nasty surprises the game could throw at me.

Good game!