

For phase one, I decided that I wanted the following:
1) Farm fields
2) Modular, stackable hills.
3) Tiny little roads
4) Buildings, but more on that later.
So, I had some fortuitous half-days at work this weekend and made a run to Home Depot and Michael's for supplies. However, as the title of this post implies, pretty much nothing went according to plan. If you've been reading my blog you know that I love making terrain, and love pretty tables. If you've read my tutorials, it might seem that nothing ever goes wrong. This post is to disabuse you of that notion.
First, the fields. Simple! Free carpet samples from home depot. The longish ones got savaged with kitchen shears.

My go-to brand for serious spray paint: I got lucky and found two cans on clearance. This stuff has the best coverage, best color, that I've ever seen come out of a spray can. However, it clogs very, very easily. Like, if you spray on an angle it clogs up completely.

Look at the color though! Just what was needed. However... ALL of the cans are now clogged up and spray absolutely nothing. All of them are almost completely full... Frustrating, but at least I got the fields done. Ok, check that off - they were essentially free, look decent, and took about 10 minutes total. The real cost was my spray cans which may or may not be ruined. I will try to soak the caps in thinner...

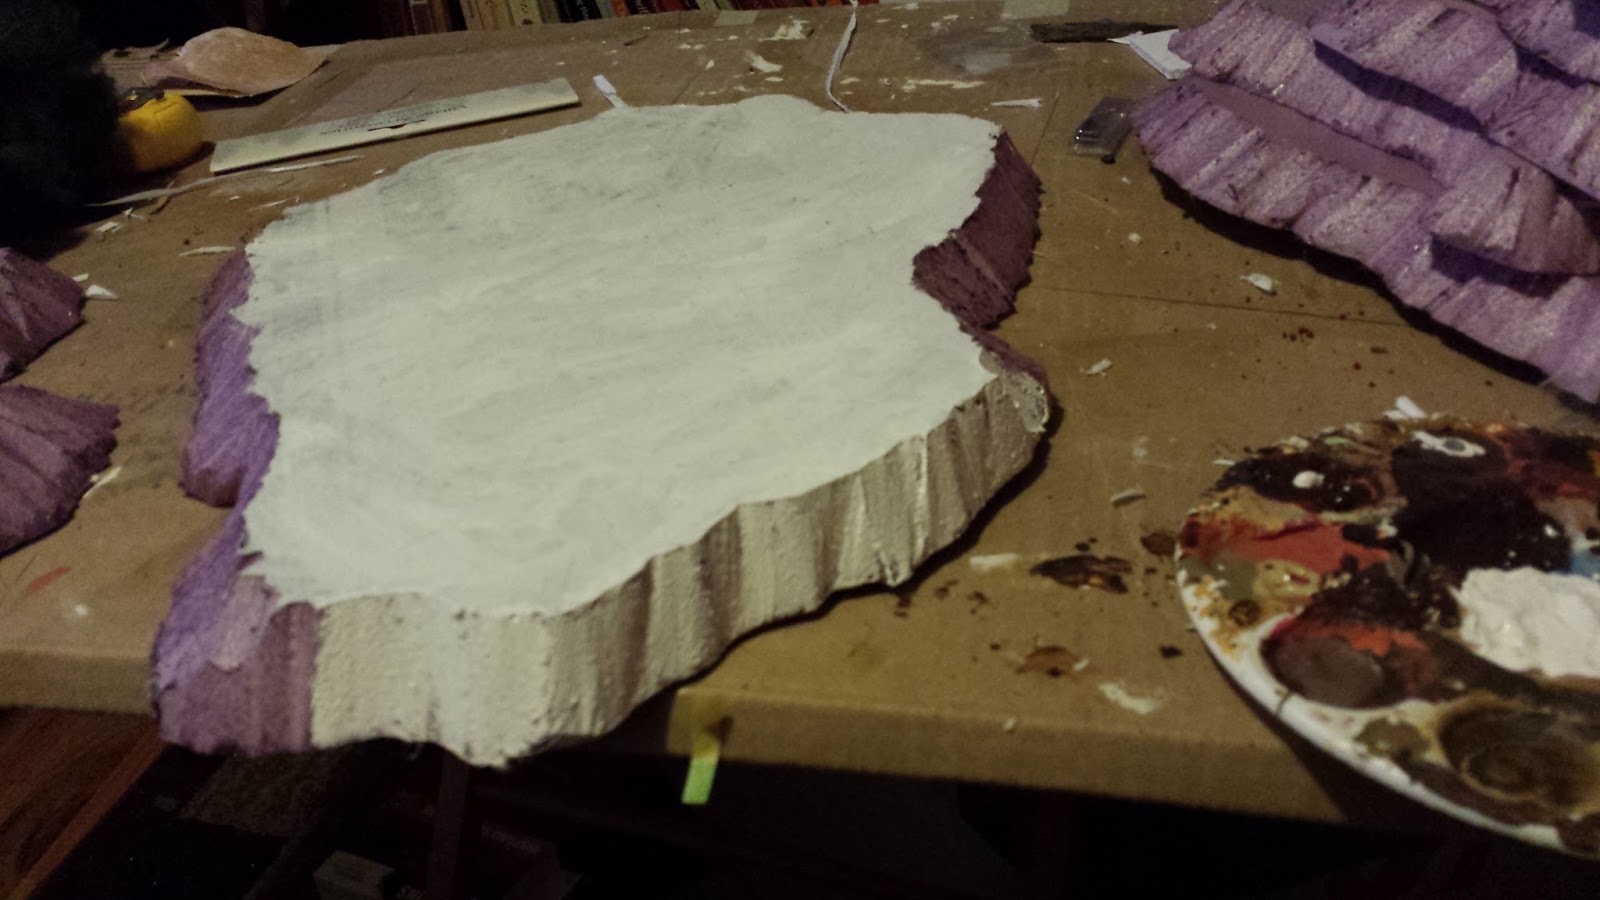
Next - hills. I'm going in a direction I normally would gravely resist. I'm not as much a fan of those ubiquitous stylized wargaming hills one sees everywhere, but using 1" foam with clearly defined levels will be exceedingly useful for Battletech so I'm going with it.
I bough a whole sheet of 1" insulation foam for about $8, and everything you'll see below is about 1/8 of the total sheet, so about $1 worth of foam. To cut it, I used the only available foam cutter I could find at Michael's, one really intended more for styrofoam than this heavy duty stuff. But if you go very slowly it works and makes far less of a mess than a knife, while doing a better job.
However, it broke after I got the below done, the wire bending and starting to spark. This is actually my third one of these, and this one lasted maybe an hour. I need another solution. I'm just not going to keep buying these, but the next step up is like $160. I have a pile of foam and no ideas, so please let me know if you have a solution.

Oh well, onwards and upwards. At least I got a good chunk of foam carved before the cutter's sparky death. Obviously spray primer is a big no-no on foam, so I brushed on gesso.
And then went to the airbrush. Now, as it happens, I got a cheap crappy brush for X-mas, and after a single use replaced it with an Iwata Eclipse. The difference is just insane. However, for this project, I decided to experiment with using highly thinned cheap craft paints, so I went back to my bottom feed crappy "Master Airbrush". Ugh, no. I had to have the PSI so high to suck the stuff up from the bottom feeder that it became a runny, splattering mess. Bad enough I wiped some pieces off with a paper towel.
So, against my better judgement, I dumped the already thinned paint into my gravity (top) feed Eclipse. Oh man, did it go on smooth as butter. See?

Oh but at what cost?!? At the very end, I got a clog, and such a clog it was that I was tempted to write epic poetry to describe it. I shall refrain.
For those of you who don't airbrush, there's a nozzle through which the tip of the needle pokes out at the very tip. It's a tiny little (easily lost) brass piece that is the devil to clean. Well, it was so gunked up that the needle wouldn't come through, which means neither could paint.
After an overnight soak and literally an hour of very careful cleaning, I got the needle to poke through a little, but not to its usual depth. I can kind of paint with it... kind of. But it's not the same, and I have my doubts that it ever will be. So, I have a new nozzle ordered and on the way.
Lesson learned: NO CRAFT PAINT IN THE AIRBRUSH. Even thinned, it's too gloppy. What do you expect for $1 or less? Hell, I don't even want to speculate about what's even in one of those bottles... So yeah, putting the money out for a couple of more bottles of airbrush ready paint or quality acrylics is the better deal than shelling out $25 for a new nozzle so you can use your $1 paint.
And then there were the roads...
So, I saw someone on line do this, so I thought I'd give it a try. Silicone caulking in strips on some kind of plastic (for non-stick purposes), smoothed out and textured. Cheap, and what could go wrong?
How about everything?

First off, it's not so easy to form into road-like shapes. Second, it doesn't dry well on plastic. Third, it doesn't really peel off all that well. Fifth, it curls at the edges.
Sixth, well just look at it. Does that look like a road to you?

No, more like a bobsled course. After peeling a couple off careful, I ended up just bunching the whole thing up with the plastic and throwing it in the garbage.
What's particularly crazy is that all of this happened over the course of two terrible days. Lets look at the casualties:
- Broken foam cutter
- 6 clogged spray cans
- terminally clogged nozzle
- utterly aborted silcone roads (1 tube caulk, 1 cheap plastic drop cloth)
- wounded pride
On the upside, I love the fields, and the hills will turn out fine, eventually. Hopefully I have an easier time with the buildings...
I feel your pain... certainly that was a hard path you went down. Still we learn by our mistakes. That being said, barring the roads I don't think you did badly at all in the final analysis.
ReplyDeleteThe first two came out ok in the end, it's just that the relative cost was far too high. Thankfully, I was able to more or less unclog the airbrush nozzle after a long time messing with it.
DeleteGreat idea on the carpet samples! I had never thought of that.
ReplyDeleteFor the roads, get some Naugahide from a fabric store and cut into strips of the size you want (I use brown color). Then spread a coat of caulking ( I again use brown). Before it dries you can score up the surface to represent cart/tank/vehicle tracks. Very flexible. Note soem people using this method cut it up in short lengths - I find this looks bad on the table and I make up long lengths for the most part. See them in use on my table in various game reports at http://mgluteus.blogspot.ca/ and http://kingstonirregulars.blogspot.ca/. Dick Bryant
ReplyDeleteOh dear, things can only get better :)
ReplyDeleteCan you not buy replacement nozzles for the spray cans, I know we can here in the UK. I used teddy-bear fur for my micro-scale fields and am pretty happy how that comes out.
I find a serrated bread knife fine for cutting expanded polystyrene, maybe give that a go.
For the roads, use a strip of bandage under the silicon caulking, helps them maintain shape better.
That's some great advice! Thank you.
DeleteNever would have thought of a bandages - going to give that another go.