


Edit: Painting the ruins: here.
Painting the tenement: here.
Church and extras: here.
I'm pretty new at this wargaming thing - I bought the AQMF starter set in January, and my obsession began. But I'm not new to gaming in general, nor to crafty sorts of things. I've made plenty of props for role-playing games, certainly, and so I guess I'm less daunted than many others I see online when it comes to giving home-made terrain a try. After all, one of the things that drew me to this hobby was the beautiful table set ups that people have posted, including the official All Quiet pics. As it turns out, terrain making is actually pretty easy, at least for a few simple things to jazz up the table.
This is my second generation of ruined buildings, the first is plenty visible on the previous battle reports I've posted - simple cardboard stuff. Some of it has turned out to be a bit too small for the large AQ bases, and I've learned to match appearance to utility in the past few months. After all, as many others have said, this is for a game, not a diorama.
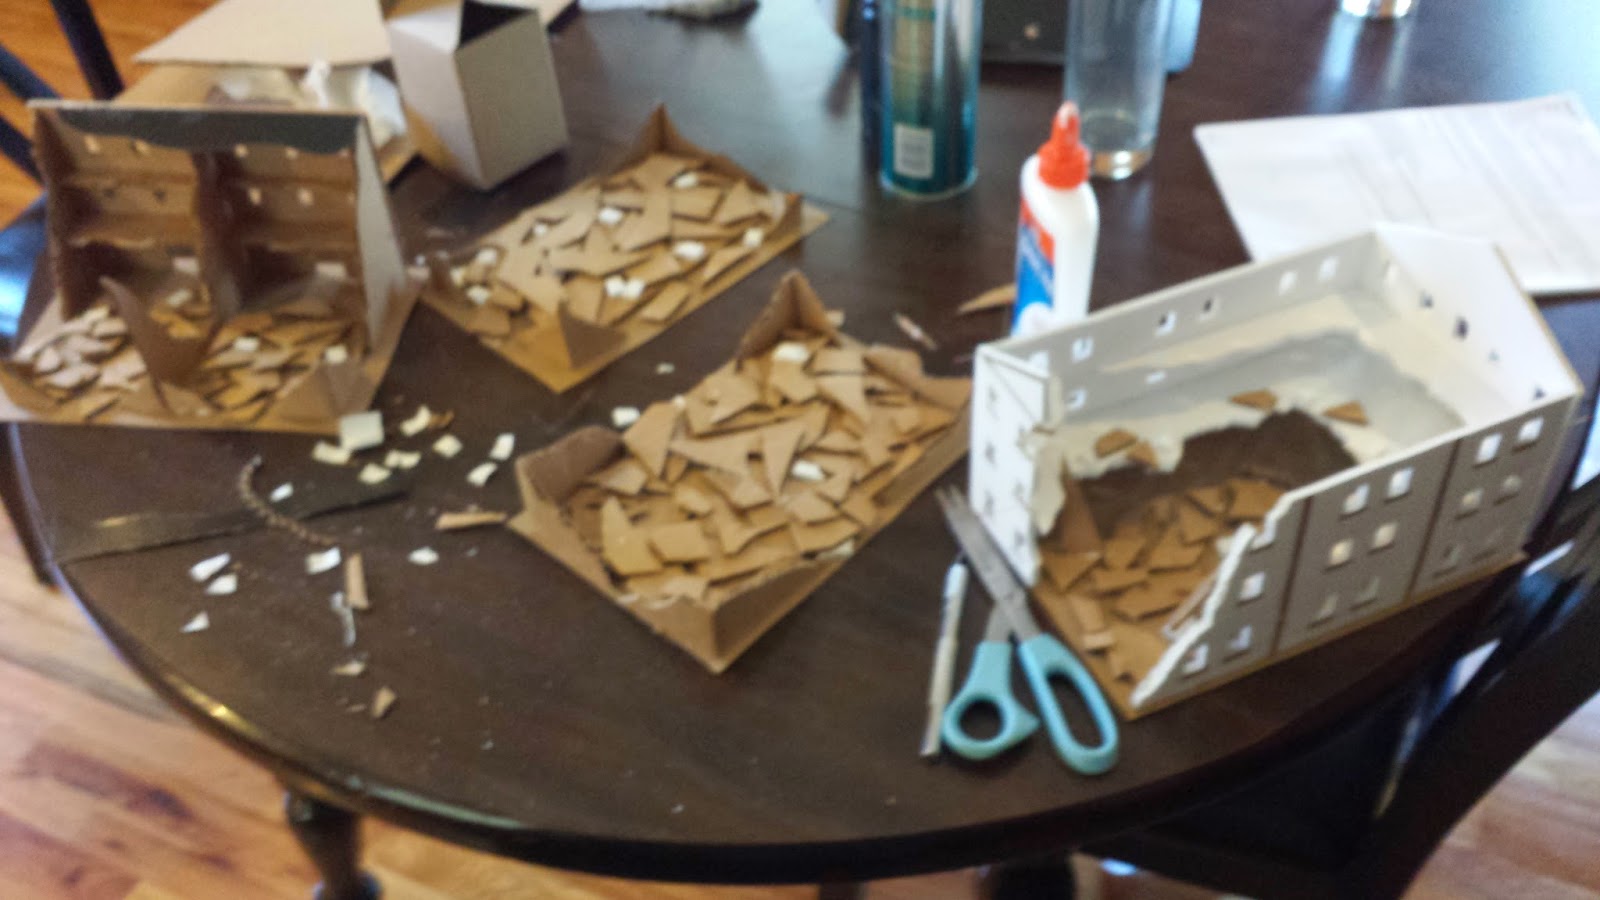
I wanted to share some pieces that I've been working on to show how easy it really is. I've been working on four pieces at once: an elaborate three-floor warehouse with a removable roof; one middle of the road piece, a standing tenement facade with a ruined interior; and two totally collapsed ruined lots. The big piece took a bit more time and work, but was worth the effort. Maybe 3 hours to construct the basic structure, including cutting all of those damnable windows. The other pieces I did at the same time in a separate session, in exactly the time it took to watch (or listen to) two episodes of Star Trek Voyager. The other steps, detailed below, took perhaps another two hours doing all four pieces at the same time. These steps were often separated by several days or even a week. It was a month from start to priming.
I built the big warehouse piece out of foam board, and 3 simpler pieces out of regular cardboard. Two of the pieces have several floors, facades, etc. I glued it together with the usual white glue (Elmer's), and used pins to hold them snug while they dried. The two ruined lots didn't get any of that treatment. I just roughly cut some cardboard, and folded the pieces to make a few corners. The rest will be filled with rubble. All of the bases are cut from cereal boxes.Similarly, the details like windowsills are that thin cereal box cardstock.


Once it was all dry (overnight), I started gluing down cardboard chunks for large pieces of rubble and collapsed building.

Without walls the ruined lots were flimsy, so I glued a layer of cardboard. It works out well, as it builds up the mound of rubble a bit too. I probably could have even put another, smaller piece on top of it if I'd wanted, for a higher mound.


Some Green Stuff to join the roof. Then a layer of wood glue (as it has some volume when it dries, to hopefully get the cracks and seams). It holds together well, but I had a hard time getting the correct angle of the roof to hold, as it's uneven weight causes it to slip to one side. It didn't dry perfectly, but I put a toothpick in the underside to keep it in place, as a sort of guide.

Wood filler (dries white), to disguise the cardboard edges. I left a few to look like girders in the rubble.


I also used the wood filler to give the roof, and any smooth edges a little texture. Turns out it also warped it a bit, which I think actually makes it look better, a bit saggy. Perfect for a ruin.

When the filler was dry, I went over it with some sandpaper to remove the fingerprints and obvious smears, making it more uniform, but still a bit rough. For rubble, I smeared regular white glue in depressions and holes, and in a few places where I wanted a pile of rubble, and then sprinkled with a good bit of (unused, obviously) cat litter. Cat litter is excellent for terrain, I'm finding. After the larger piles, I sprayed most of the floors with scenic cement (which is really just watered down white glue), really wetting up the cardboard rubble and parts of the floors. Then I sprinkled cat litter and regular old sand throughout.

Next, some broken toothpicks, scattered among the rubble. A little extra white glue for this.


Ruins!


Primed ruins! Of course, I got the wrong primer and didn't realize it until it was all mostly dry. Wanted matte, got semi-gloss. That's one way to learn to read the label.


Still, not bad. I'm going to give it another light coat with a matte spray. Can't hurt, as the extra primer will help hold the kitty litter in place.
Stay tuned to see how they look painted up!
No comments:
Post a Comment